
- Features
- Create a segment
- Facet Features
- Types of Facets
- Configure Facets
- Field Mapping
- Field Properties
- Real-time Preview
- Instantaneous Publishing
- Ranking Insights
- Clickstream Data
- Boost/Bury
- Sort
- Slot
- Pin
- Filter
- Landing Pages
- Set Banners
- Create a Site Rule
- Managing Field Rules
- Managing Page Rules
- Campaign
- Overall Performance
- Page-Level Reporting
- Zero Result Categories
- Product Reports
Site-rules, as the name suggests, are the rules that are applied to all search queries received on your website. Site rule can be used to promote products of a specific brand or filter out-of-stock products from all search queries.
Site Rules allow you to promote or demote a product across all the pages on your site. Similarly, you can use a Site Rule to filter search results to not display products that are out of stock.
-
Navigate to Merchandising → Category Pages → Site Rule.
-
Click + Add Site Rule.

-
If you want to edit existing site rule, click View Site Rule, follow steps 4 through 7, and then click RE-PUBLISH.
-
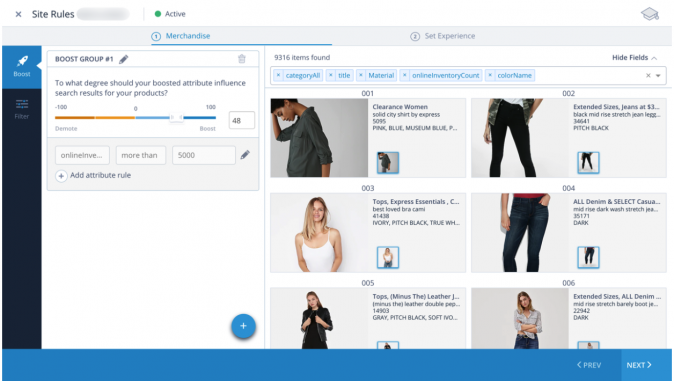
To create a boost group, on the Boost tab, do the following:
- Select the field name from the dropdown list.
- Select comparator based on the field (equal to, not equal to, contains, does not contain).
Note: For the field “price”, comparator options are equal to, in between, more than, less than. - Specify the value.
- Move the slider to assign a boost level. The default value of the boost is Low.
- To add multiple attribute rules for a boost group, click Add attribute rule.
- To create multiple boost groups, click
 .
.
Tip: As a best practice, always assign different boost levels across different boost groups in order to get the desired arrangement of the results.
-
To create a filter group, click the Filter tab, and then do the following:
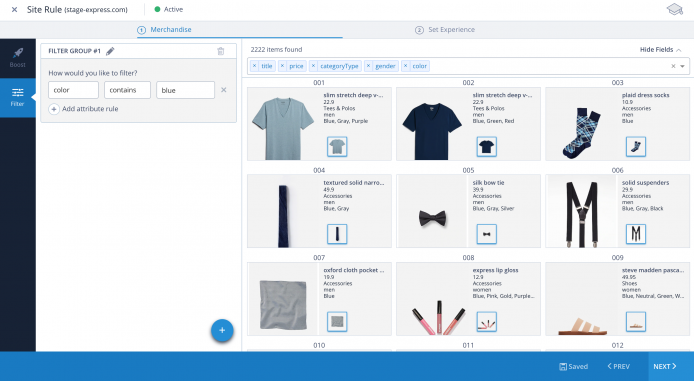
- Select the field name from the dropdown list.
- Select comparator based on the field (equal to, not equal to, contains, does not contain). For the field “price”, the comparator options are equal to, in between, more than, and less than.
- Specify the value.
- To add multiple attribute rules for the filter group, click Add attribute rule.
- To create multiple filter groups, click .
Only the products that satisfy all the attribute rules and filter groups will be shown in the results.
-
Click NEXT.
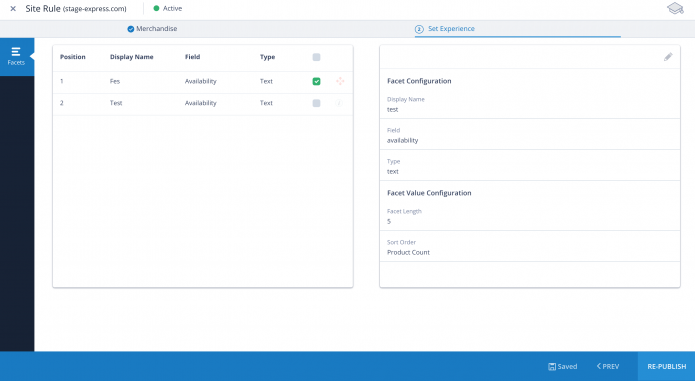
The Facets tab appears. You can also enable/disable the facets and the order in which they should appear across the site for all the pages.If you want to add a new facet, you can navigate to Manage → Configure Site to add facets. For more information on configuring facets, see Configure Facets.
- To reposition a facet, do the following:
- Hover on the faceting row you want to reposition. The reposition icon
 appears.
 - Click , and then drag the facet to a new position.
- If you want to show the facet on your site, in the Show column, select the respective facet checkbox.
- Click
 to save the changes.
- Hover on the faceting row you want to reposition. The reposition icon
-
To edit values of a facet, do the following:
- Click the facet for which you want to edit the values.
- Click
 .
. - Type the new facet length.
- Select sort order for your facet. You can sort either by product count or alphabetically.
- Click Save.
-
To go to the previous screen, click PREV.
-
Click PUBLISH.
-
To reposition a facet, do the following:
- Hover on the faceting row you want to reposition. The reposition icon appears.
- Click , and then drag the facet to a new position.
- If you want to show the facet on your site, in the Show column, select the respective facet checkbox.
- Click to save the changes.
-
To edit values of a facet, do the following:
- Click the facet for which you want to edit the values.
- Click .
- Type the new facet length.
- Select sort order for your facet. You can sort either by product count or alphabetically.
- Click Save.
-
To go to the previous screen, click PREV.
-
Click Re-PUBLISH.
- Did this answer your question?

