
- Prepare your Schema
- Prepare your Catalog
- Upload your Feed
- Full Feed Upload
- Delta Feed Upload
- Single Record Upload
- Check Product Count

- Recommendations Endpoint
- Authentication
- Header
- Request Parameter
- Response Components
- Explanation Request Parameter
- Quick Integration
- Installation
- Fetch Recommendation Results
- Default Unbxd Template
- Custom Template
- Unbxd Template Customization
- Custom Feature Examples
- Quick Integration
- Installation
- Fetch Recommendation Results
- Installation
- Configuration
- Components
- Composer
- Direct Plugin Feed Upload
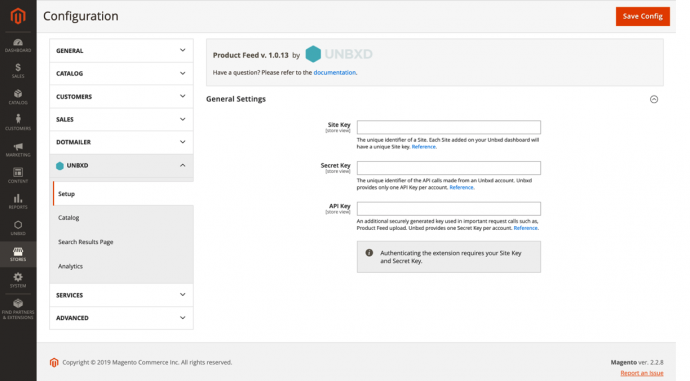
- Authentication
- General Settings
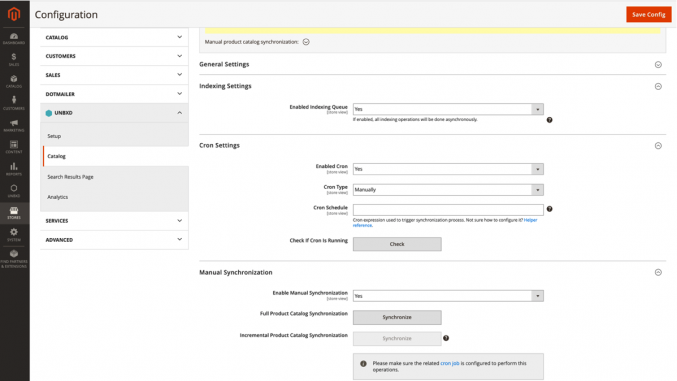
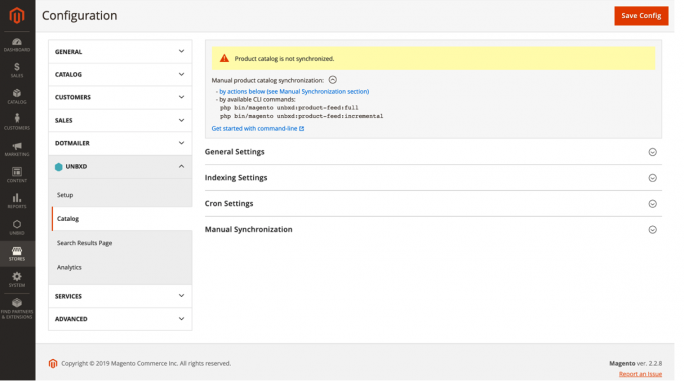
- Configuration
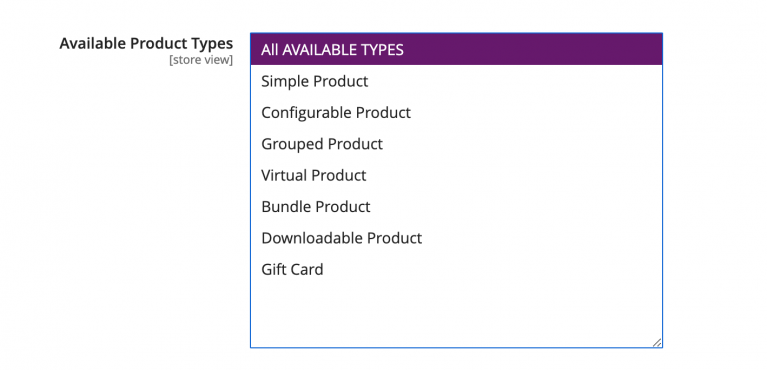
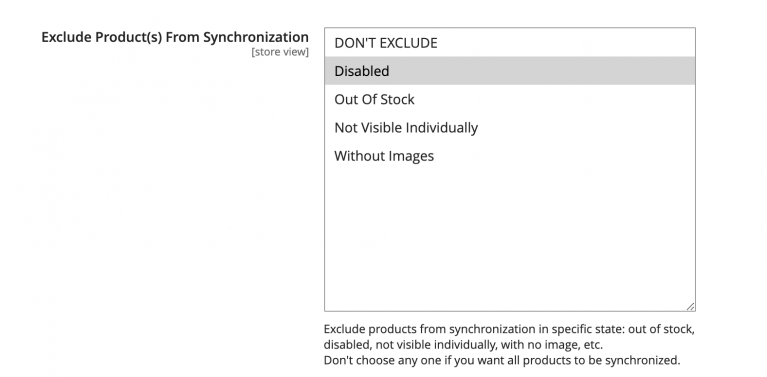
- Catalog Sync
- Catalog Sync Information
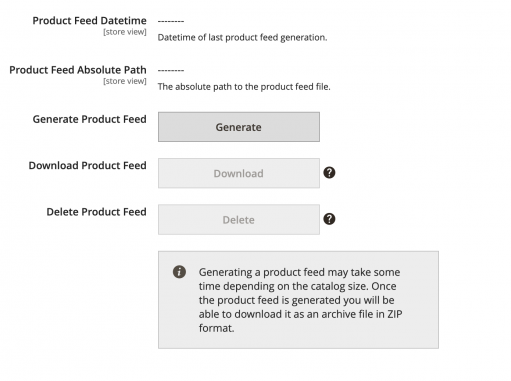
- Product Feed Generator
- Feed View
- Indexing Queue View
- Analytics Integration
- Upgrade
- Uninstall
- Installation
- Configuration
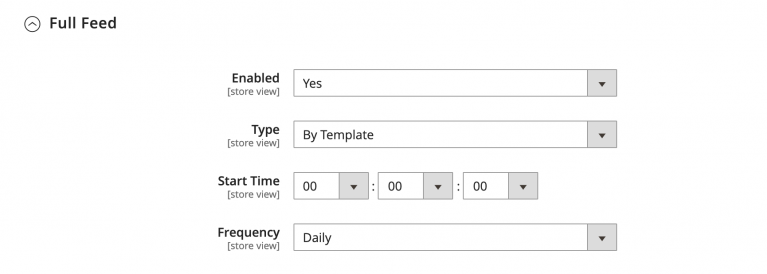
- Configure Feed
- Cron Job
- Features
- Uninstall
Before you can use the Unbxd Site Search extension:
- Create an Unbxd account and a site within our Console.
- Set up Magento2 on your server.
We support versions 2.2.x and above.
Backup your web directory and store database.
To backup using the Magento backup function, navigate to System > Tools > Backups.
Maximum Number of Synchronization Attempts
The number of synchronization allowed in case of page load errors is specified in this bar. The value can vary between 1 to 5.

Data Fields Mapping
Data Fields mapping provides the ability to manually map the Unbxd Fields to the defined product attribute.
Unbxd Field can have the values as Availability, Category Path Id, Image URL, Product URL, Title, or UniqueID which can be mapped to the product attribute specified in your catalog.
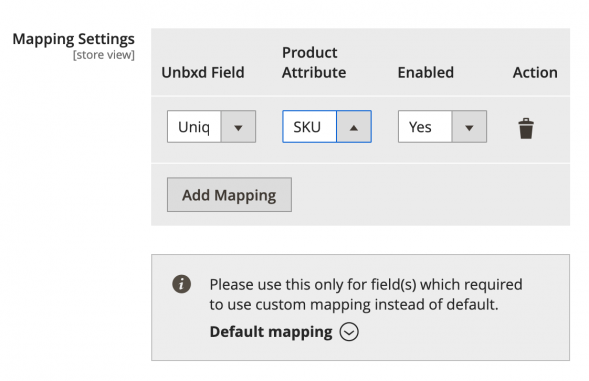
In the above illustration, we can see the Unbxd field ‘UniqueID’ is mapped to SKU to track the inventory status.
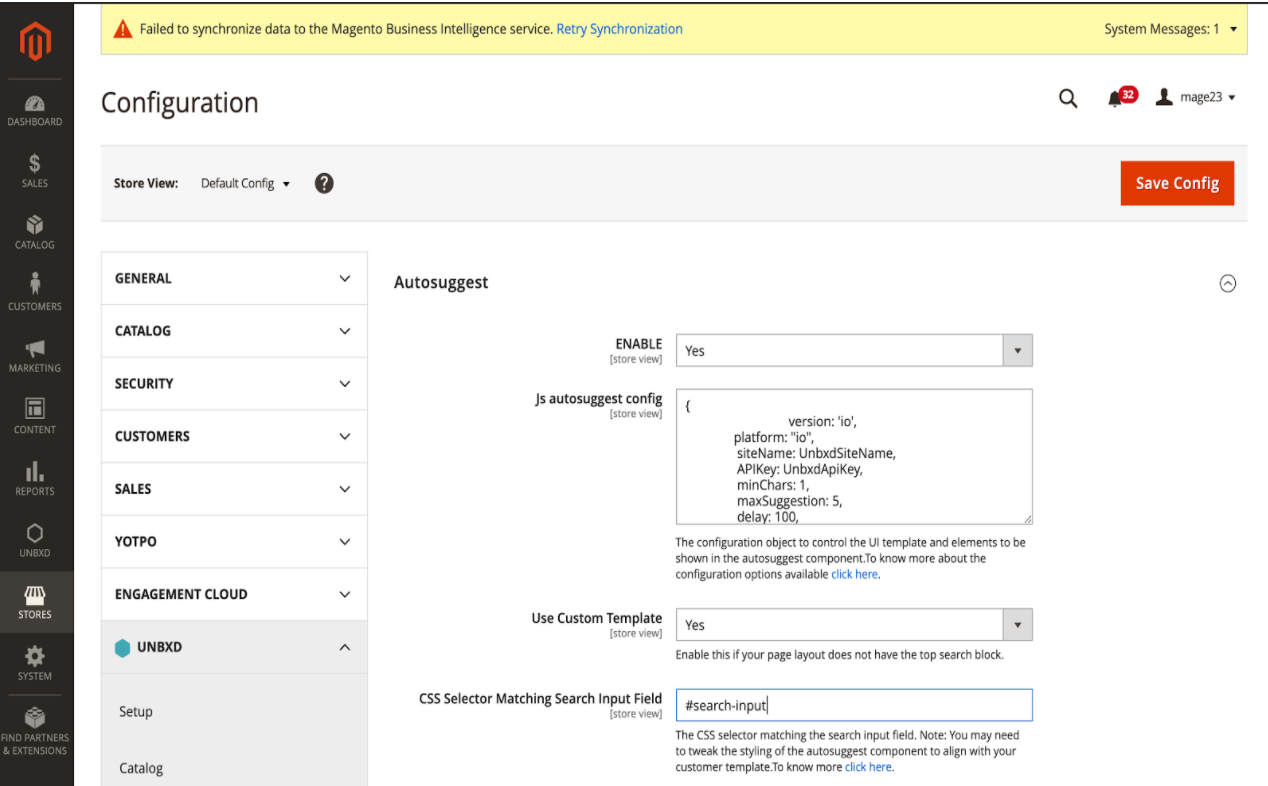
Enable Autosuggest Feature
After the catalog indexing is done, you can navigate to Unbxd > Search config and in the ‘Autosuggest’ section, enable the field value to ‘Yes’ to enable Autosuggest Feature.
Enable Custom Template
If your theme doesn’t contain the top search block in the header section, then enable the use of the custom template and populate the search input box selector in the CSS Selector matching field.
Enable Unbxd Search Features
The type as you suggest features powered by Unbxd can be enabled in a Magento powered webshop by following the below steps,
- If you have not enabled the Unbxd_SearchJs module then perform step 1 in enabling Unbxd Auto Suggest Features.
- Enable the search feature, login into the admin console, navigate to Unbxd > search config.

- In the search section, update the enabled field value to ‘Yes’.
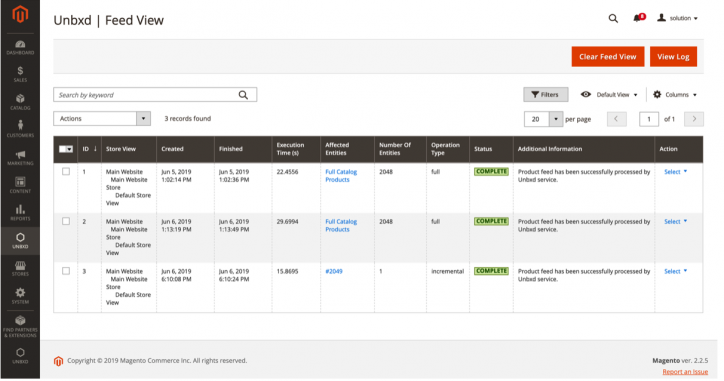
To view the description of the labels in the screenshot above, refer to the table below.
| Label | Description |
|---|---|
| ID | Indicates the unique identifier of the record |
| Store View | Indicates the store related to upload operation |
| Created | Indicates the calendar date and time the specific upload queue entry was created |
| Finished | Indicates the upload end time of the catalog |
| Execution Time(s) | Indicates the duration of time (in seconds) the upload took to complete |
| Affected Entities | Indicates the total number of products affected by the feed upload |
| Number of Entities | Indicates the total number of entities in the upload process |
| Operation Type |
Indicates the status of a feed upload operation
|
| Additional Information | Indicates the information related to reindexing |
| Action |
Indicates the action available for the specific entity
|
| Clear Feed View | Allows you clear the Feed View queue |
| View Log | Allows you to view the log file entries for the entire cron job. You can also download the log file, refresh the log entries, and clear the log |
| Actions | Allows you to delete feed upload for multiple entities |
| Filters | Allows you to create filters to refine the Feed View table |
| Default View | Allows you to reset the Feed View table to its original settings |
| Columns | Allows you to select the columns you want displayed in the Feed View table |
| Log Viewer |
Provides some operations with log file:
|
 You cannot delete an entity when the upload is ‘Running’
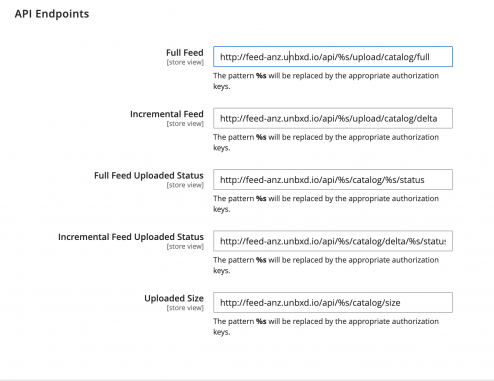
Exposing Endpoints
You can integrate API endpoints to directly upload full feed or delta feed, know the upload status, or check the size of the uploaded catalog.

The labels in the screenshot above are explained in the table below:
| Labels | Description |
|---|---|
| ID | Indicates the unique identifier of the record |
| Store View | Indicates the store related to reindex operation |
| Created | Indicates the calendar date and time the specific Indexing queue entry was created |
| Started | Indicates the reindexing start time of the catalog |
| Finished | Indicates the reindexing end time of the catalog |
| Status |
Indicates the status of a catalog’s reindex operation
|
| Execution Time(s) | Indicates the duration of time (in seconds) the reindexing took to complete |
| Affected Entities | Indicates the total number of products affected by reindexing |
| Number of Entities | Indicates the total number of entities in the reindex process |
| Action Type |
Indicates the type of reindexing action for the entities.
|
| Additional Information | Indicates the information related to reindexing |
| Actions: |
Indicates actions you can perform on required cron job
|
| Log Viewer |
Provides some operations with log file:
|
- Did this answer your question?
