- Prepare your Schema
- Prepare your Catalog
- Upload your Feed
- Full Feed Upload
- Delta Feed Upload
- Single Record Upload
- Check Product Count
- JavaScript Based Integration
- HTML Based Integration
- Introduction to GTM
- Requirements
- Introduction
- Events
- API Integration
- Search Endpoint
- Authentication
- Header
- Request Parameter
- Response Components
- Explanation Request Parameter
- PDP API Format
- Sample Request
- Request Parameters
- Response Parameters
- System Requirements
- Install SDK
- Initialize SDK
- Unbxd Commerce Search
- Integrating Unbxd Autosuggest
- Unbxd Analytics
- Unbxd Browse
- Unbxd Recommendations
- Sample App
- Installation
- Unbxd Analytics
- Unbxd Commerce Search
- Unbxd Autosuggest
- Unbxd Browse
- Unbxd Recommendations
- Sample iOS App
- Quickstart with Unbxd Template
- Quick Integration to your site
- Detailed Guide
- Authentication
- Types of Pages to Render
- Configuring the Page
- Instance Methods
- More Information
- Available Configurations
- Libraries
- QuickStart
- Authentication
- Configuring Autosuggest
- Sample Options Object
- Handlebar Functions
- List of Configs
- Search Template
- Loader Config
- Facet Config
- Pagination
- Spellcheck
- Sort Config
- PageSize Config
- Breadcrumb Config
- Product Views
- Variants
- Quick Integration with Unbxd template
- Quick Integration to your site
- Installation
- Authentication
- Types of pages to render
- Configuring the page
- PageSize Config
- More Info
- Endpoint
- Authentication
- Headers
- Request Parameters
- API Response
- Response Components
- Create an Unbxd Account
- Create an Unbxd Site
- Upload a Catalog
- Setup Search
- Integrate Search
- Create an Unbxd Account
- Create an Unbxd Site
- Upload a Catalog
- Setup Search
- Integrate Search
- Plugin Installation
- Configuration
- Uninstallation
- Test Plugin Installation
- Installation
- Authentication
- Catalog
- Catalog Sync
- Product Integration
- Custom Template
- Indexing Queue View
- Feed View
- Upgrade
- Uninstall
- Installation
- Authentication
- Catalog
- Cron Job
- Product Config
- Uninstall
- Installation
- Configuration
Quick Onboarding
With every business pushing itself online, expectations of shoppers from an eCommerce site have increased. Owing to the same, Unbxd has been delivering a competent search engine for them.
A comprehensive site-search helps to:
- Maximize conversion rate
- Increase the customer retention rate
- Improve a shopper’s experience
- Quickly map the shoppers’ to their intended products
- Provide effective results with merchandising techniques
- Reduce the zero results
Looking at the complexities that you face to set up your site search, we at Unbxd have launched a simplified Onboarding process. The Onboarding process streamlines the process of uploading catalog, indexing, setting up relevance, and integrating the search in a mere five steps.
Our Unbxd’s AI identifies the relevant set of synonyms, searchable fields, and facets in accordance with your product catalog upfront. The AI recommendation sorts your entire catalog by deciding which fields should be marked searchable along with their search weights.
Such upfront settings help you save time and efforts to set your relevancy settings. This documentation will guide you through the process of creating and integrating your site with Unbxd.
You can also refer to this video to set up your site search within 5 minutes using Unbxd’s new Onboarding console :
You can set-up a site search solution using Unbxd with the following steps :
- Create an Unbxd Account
- Create an Unbxd Site
- Upload a Catalog
- Setup Search
- Integrate Search
Tips: A fully functional Sandbox will be available for testing after step 4. You can use our UI library to quickly integrate Unbxd search on your website.
Create an Unbxd Account
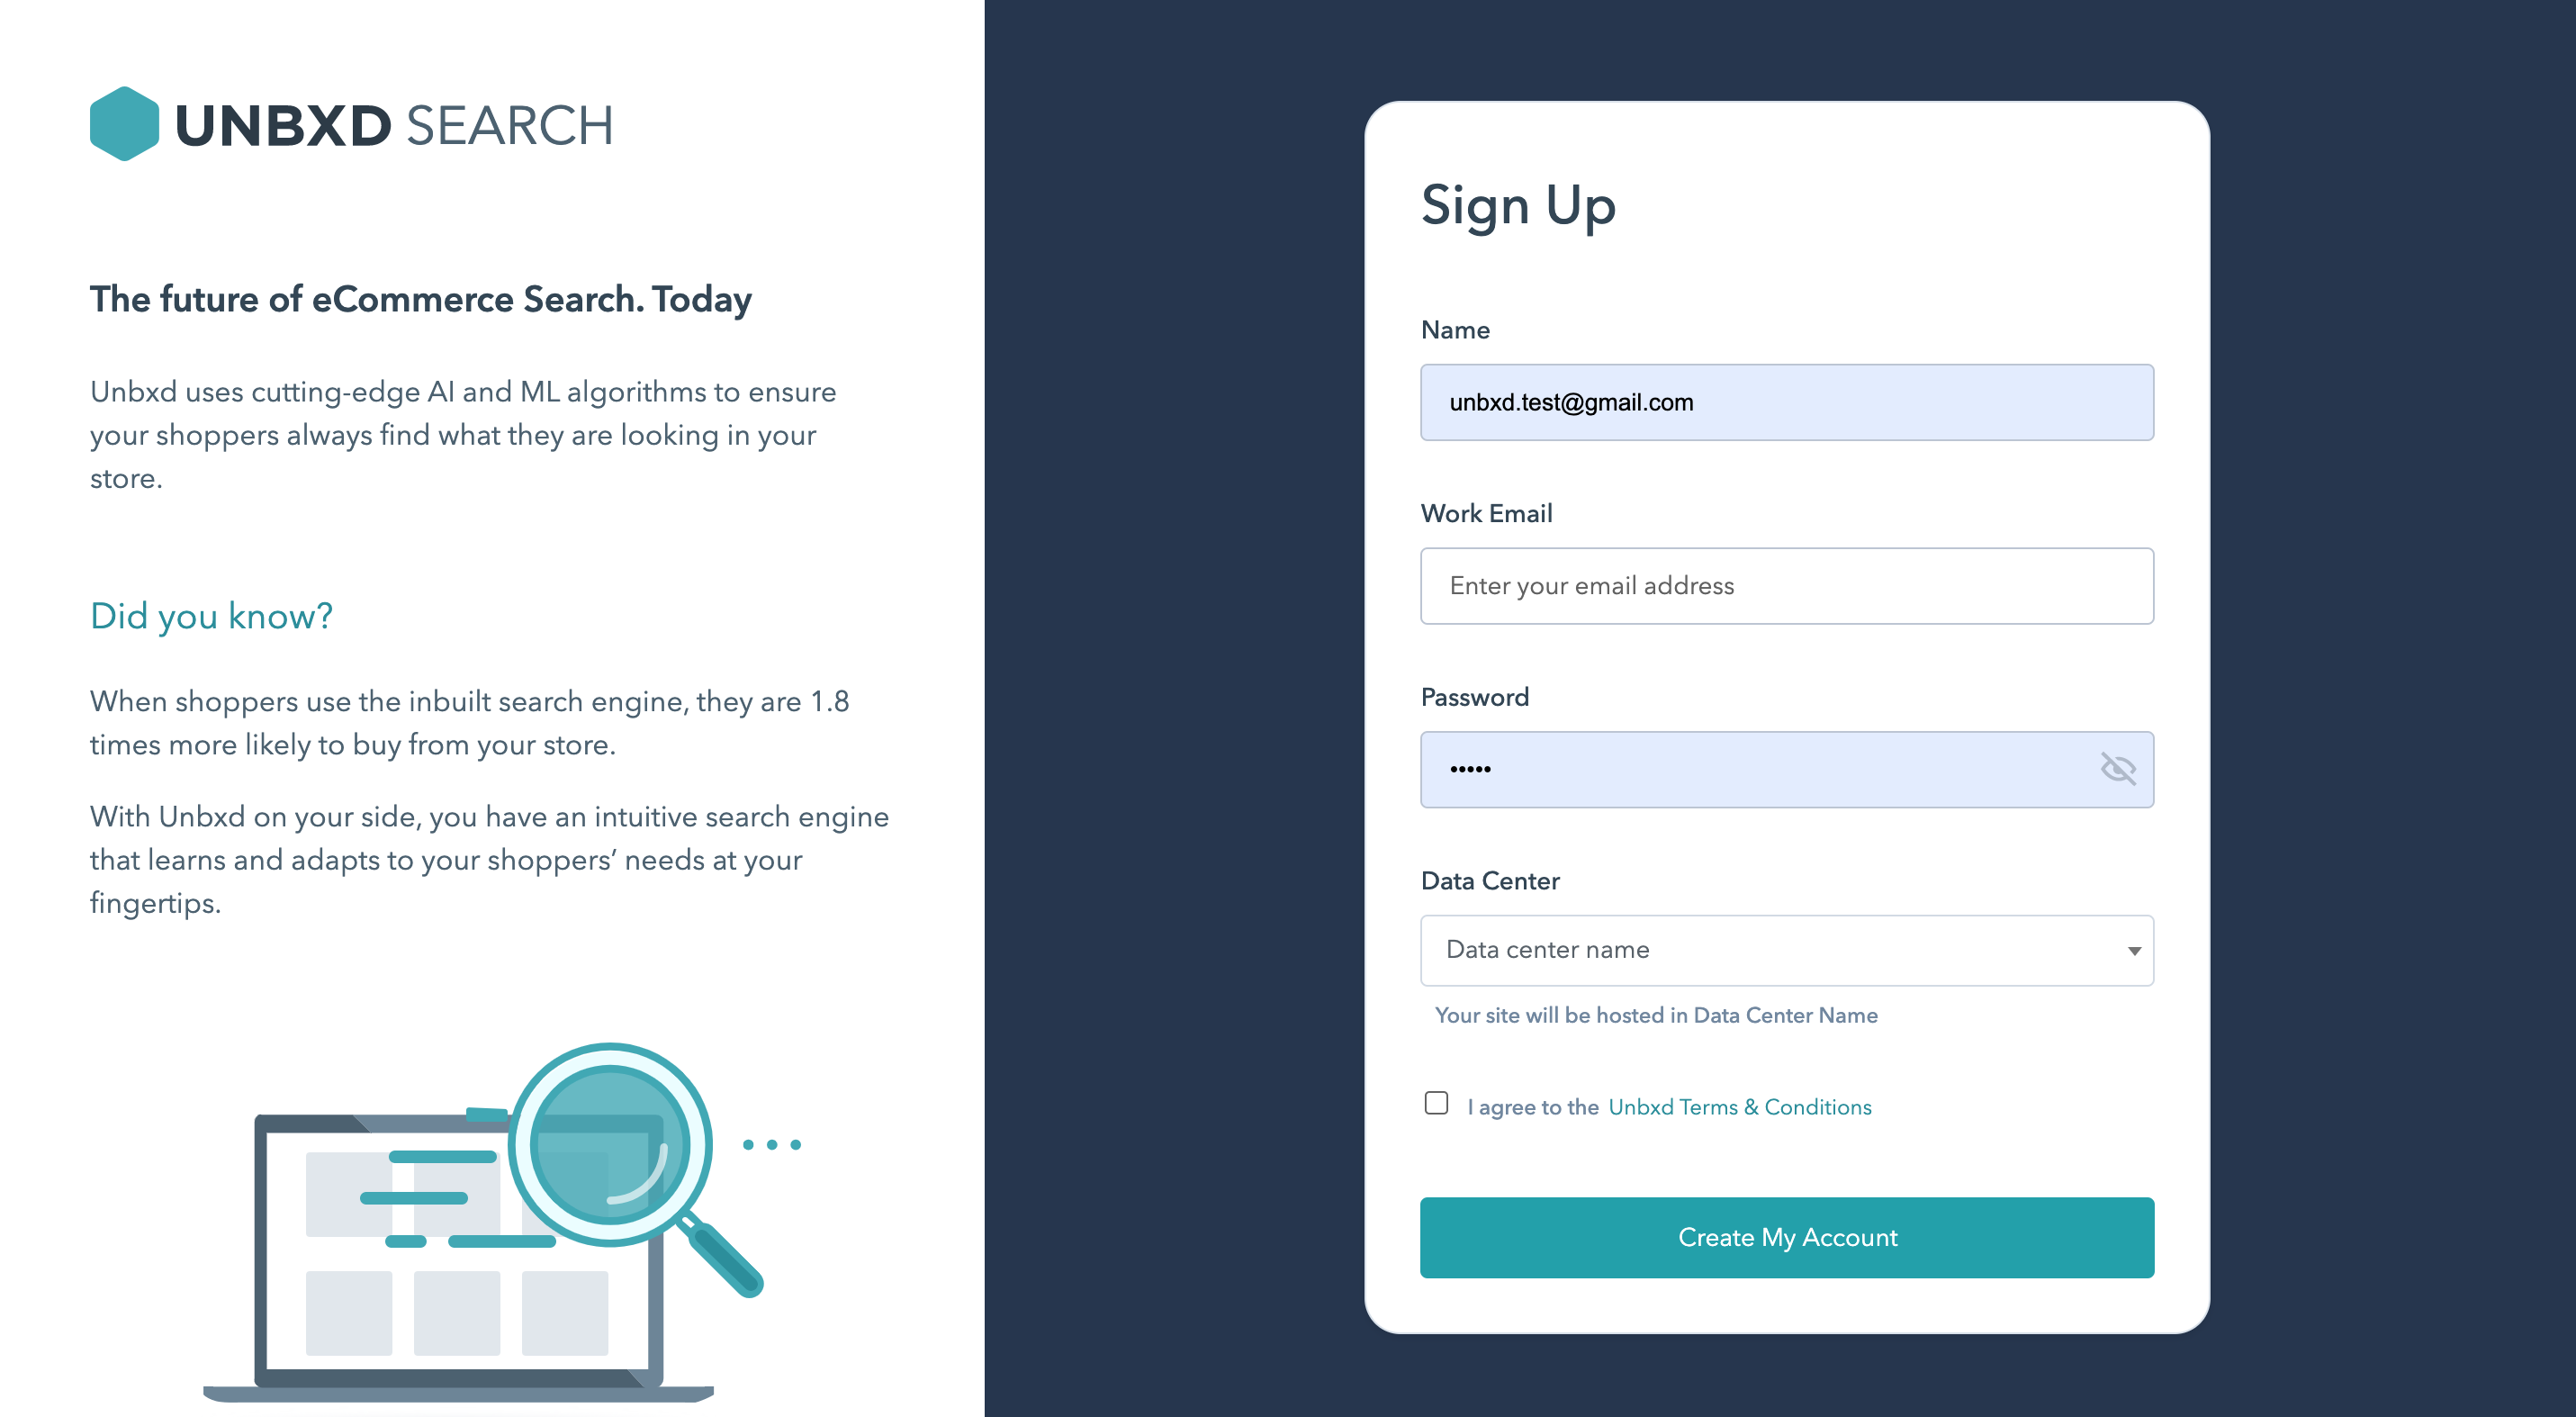
Before setting up your site search, create your Unbxd account. Unbxd helps you to create a free trial account by signing into console.unbxd.io/signup.
To create your account, specify your account details viz Name, Work Email, Password, and Data Center.
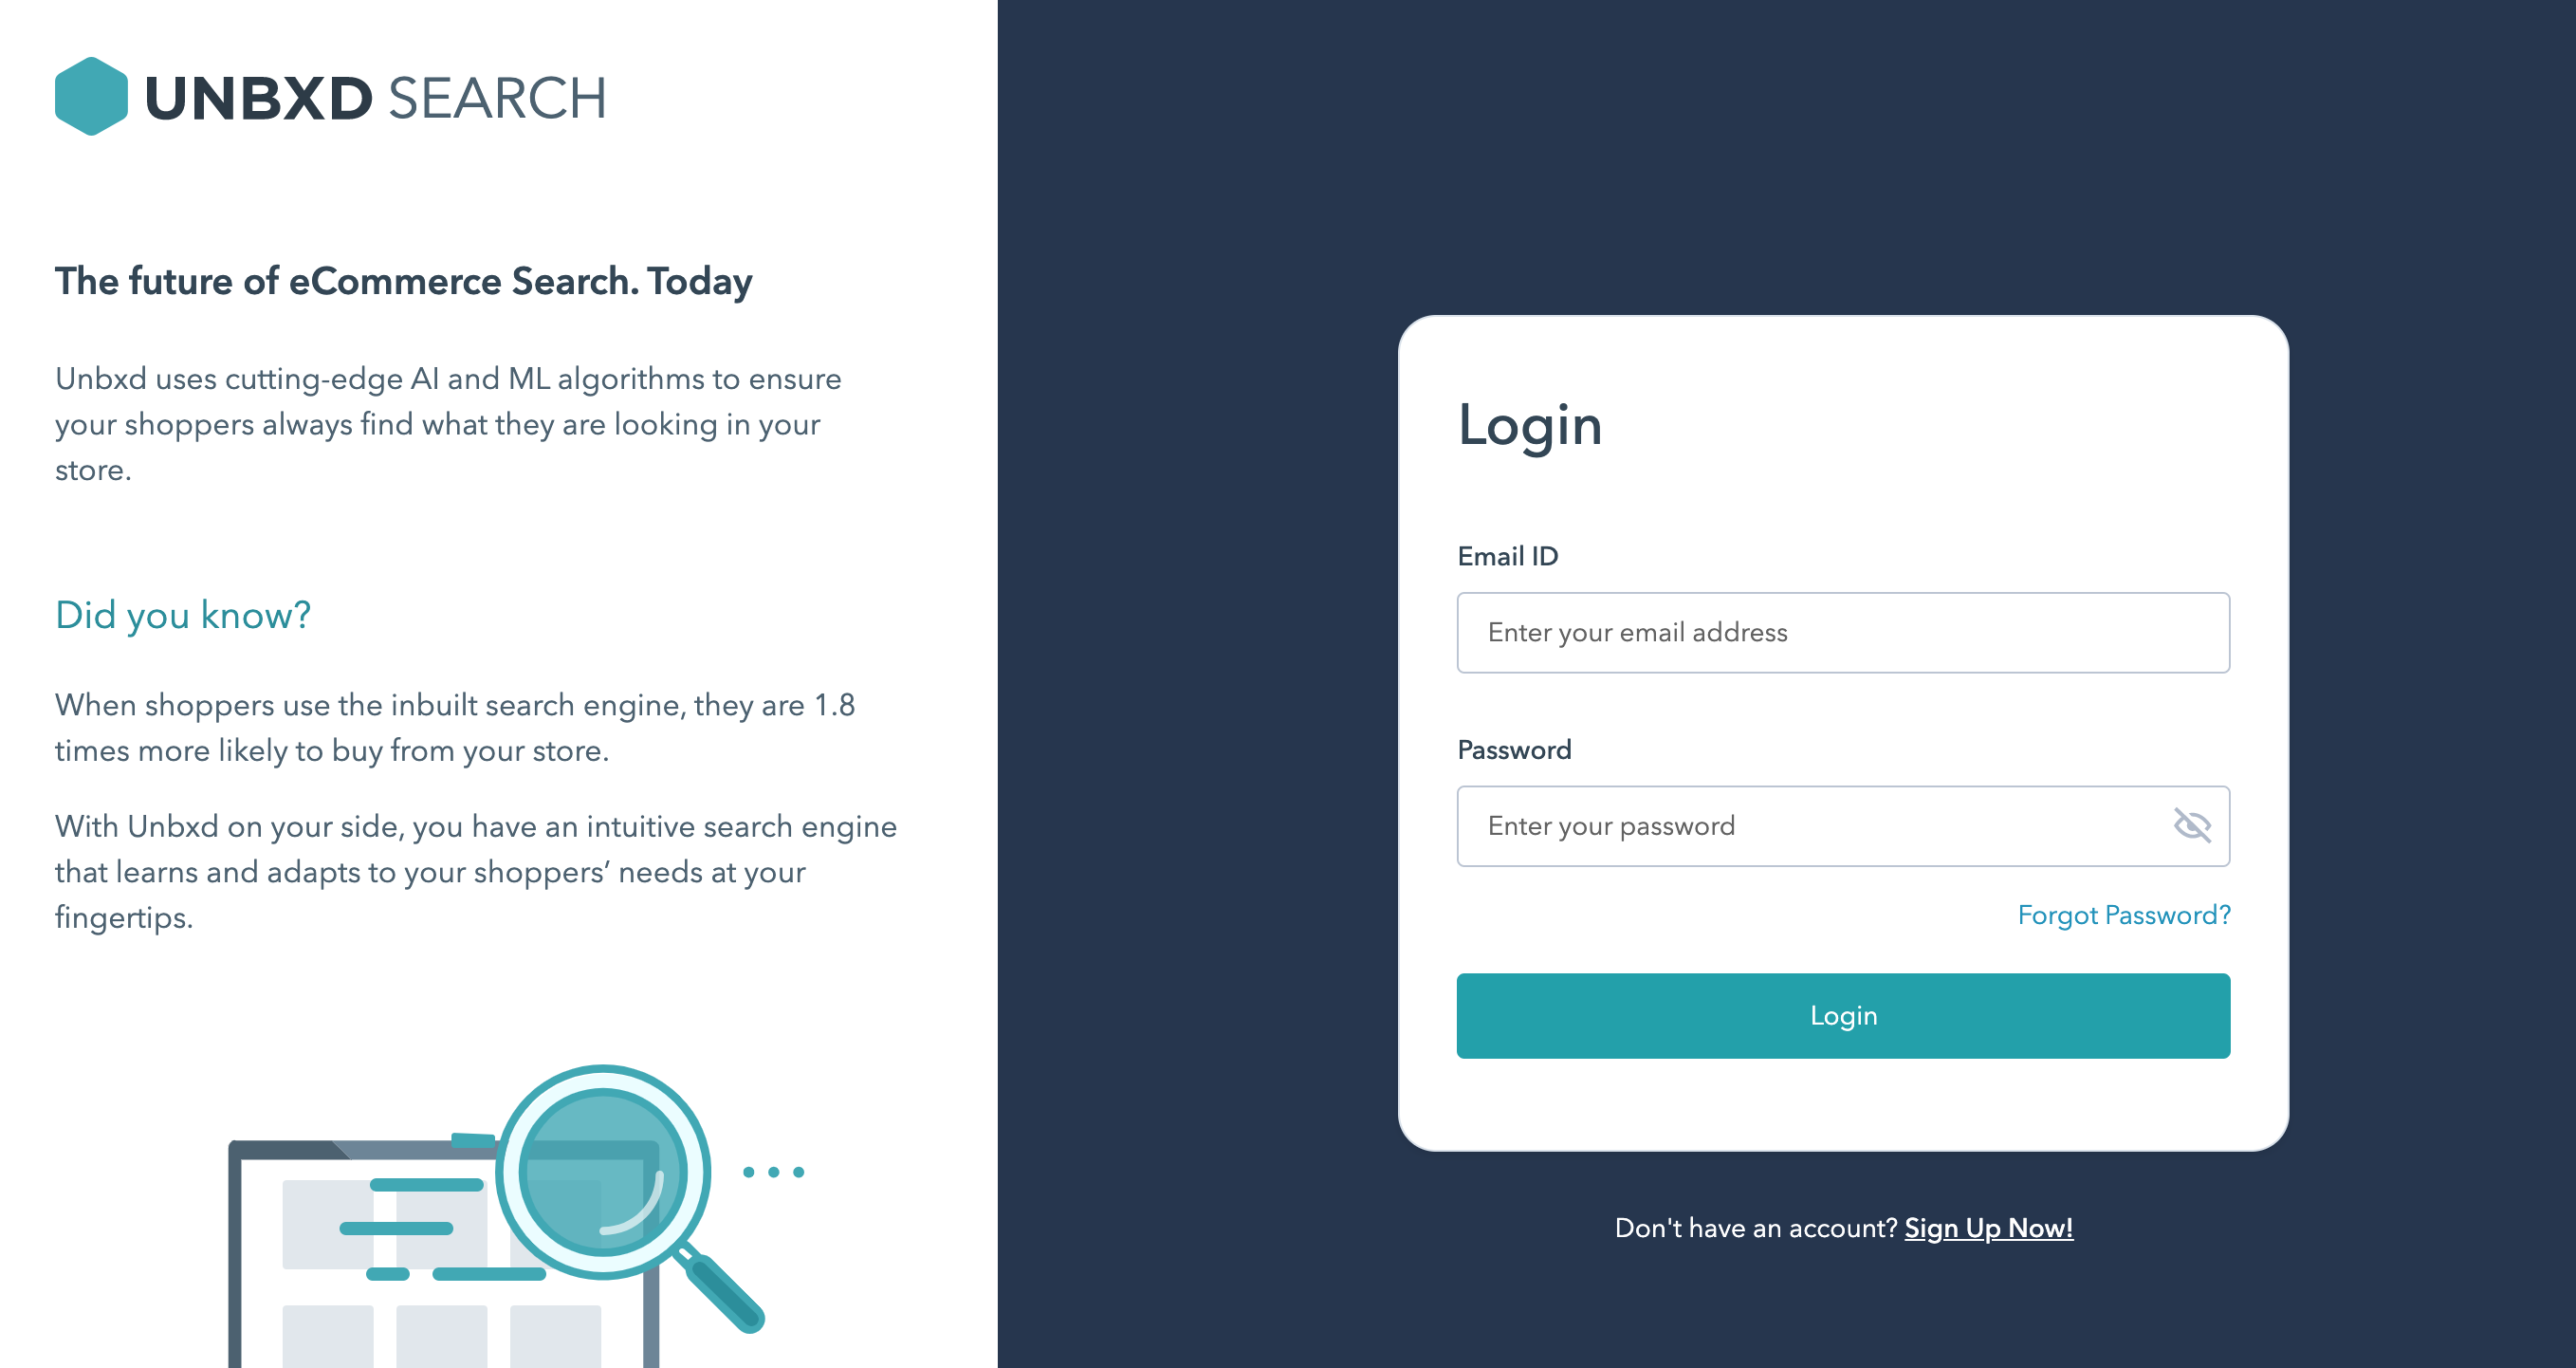
Once you have signed up with your details, our team is notified about a new user sign-up. Our team activates your account post verification. You can reach out to sales@unbxd.com for queries related to account activation. Once your account is activated you can login to Unbxd console.
Log in needs your email address and password to let you in to create your site setup.
NOTE: If you’re not able to login to your account, it may happen due to three reasons:
- You have not created your account. So, first signup and then log in to your account.
- You have not activated your account.
- You have typed incorrect credentials. So, make sure the credentials are correct and in case you forgot your password, click ‘Forgot Password’ and reset it.
Create an Unbxd Site
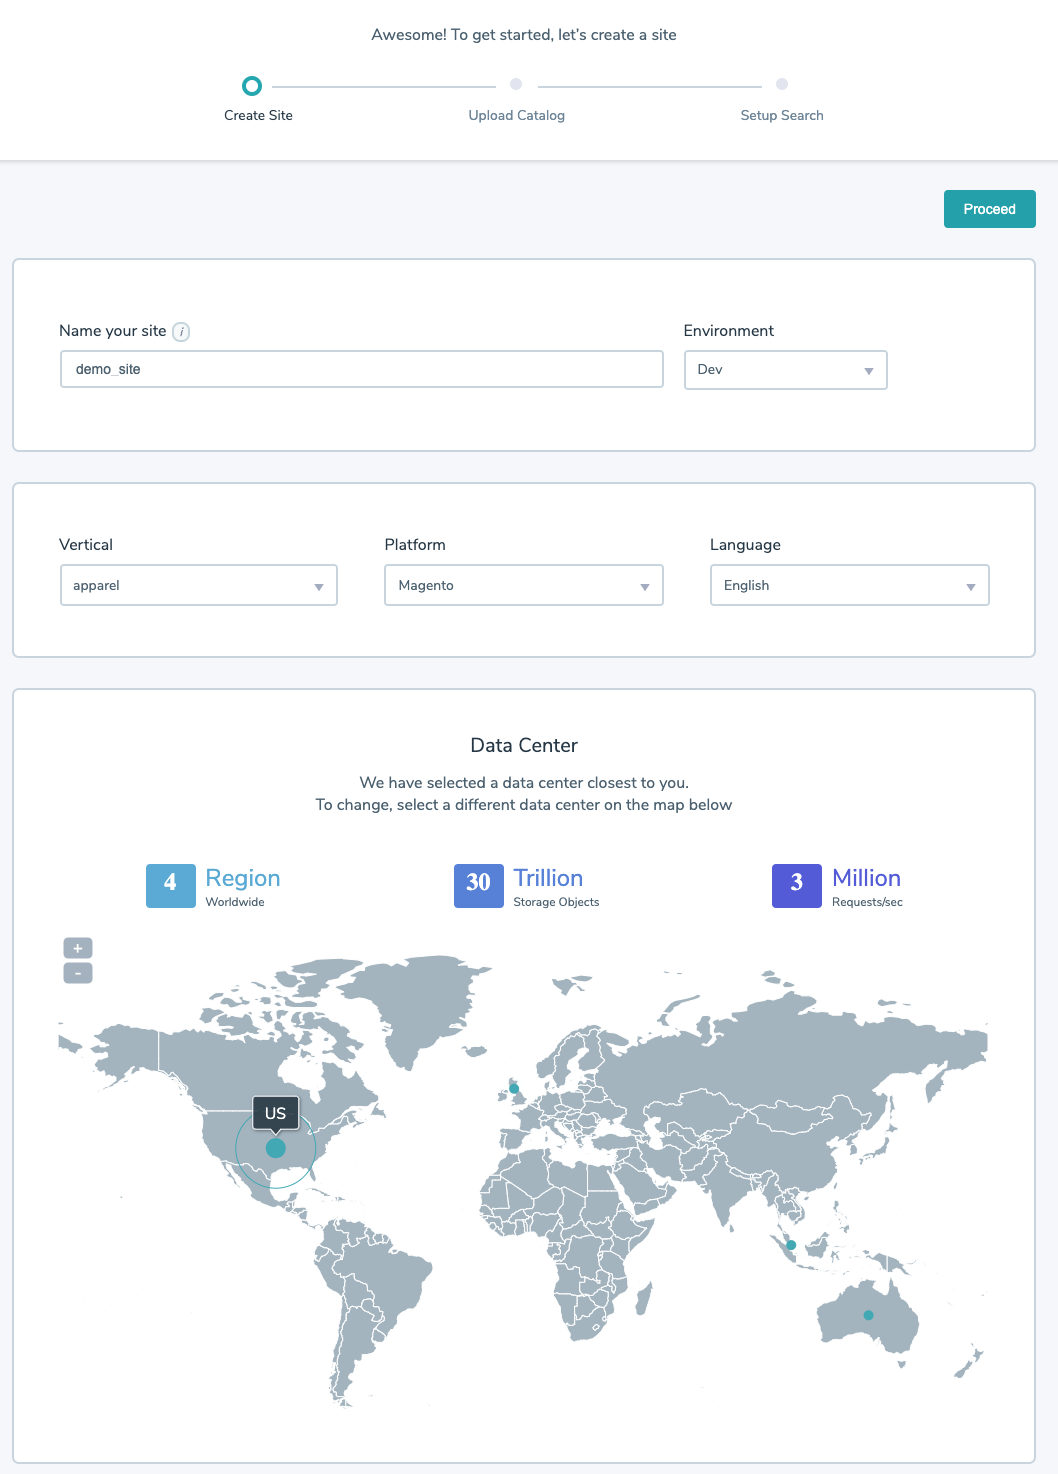
After you have created your account and logged into it, the next step is to create an “Unbxd site”. Each “Unbxd site” represents an independent instance for Search / Browse with a catalog. This entire section on the console will ask you to fill in the relevant field values to start off with your eCommerce site.
To create a site following details are required:
- Name of your site: Fill in a relevant name for your site like if your Sitename is Walmart, use walmart_dev or walmart_demo. Best practices to name your site is by appending the environment type (Dev, Prod, Stage) along with your site name. The name of the site is used to uniquely identify the site.
- Environment: Select the hosting environment for your eCommerce site. It can be Prod, Dev, or Staging.
- Vertical: Select the most appropriate business vertical from the dropdown menu. The vertical is used for setting up relevance on the website.
- Platform: Select any eCommerce platform from the dropdown. We will keep you updated about the latest updates on Unbxd about your platform.
- Language: Select the preferred language for your Unbxd site based on the language used in your catalog to describe products.
- Data Center: Choose the data center that is nearest to the shoppers for better response time.
Once you have filled in all the site details, click the enabled “Proceed” button to start the site creation. The process of site creation may take a few minutes.
NOTE: At the time of site creation, customers will get an option to select the location of their website.
Upload a Catalog
After setting up the site, you can start building your site solution by uploading your product catalog. Select a mode for uploading your catalog from the following options :
- Platform Plugin: Use our platform plugins to upload catalog if you are using one of these platforms (SAP Hybris and Magento2). Using platform plugins is the fastest way to integrate Unbxd search.
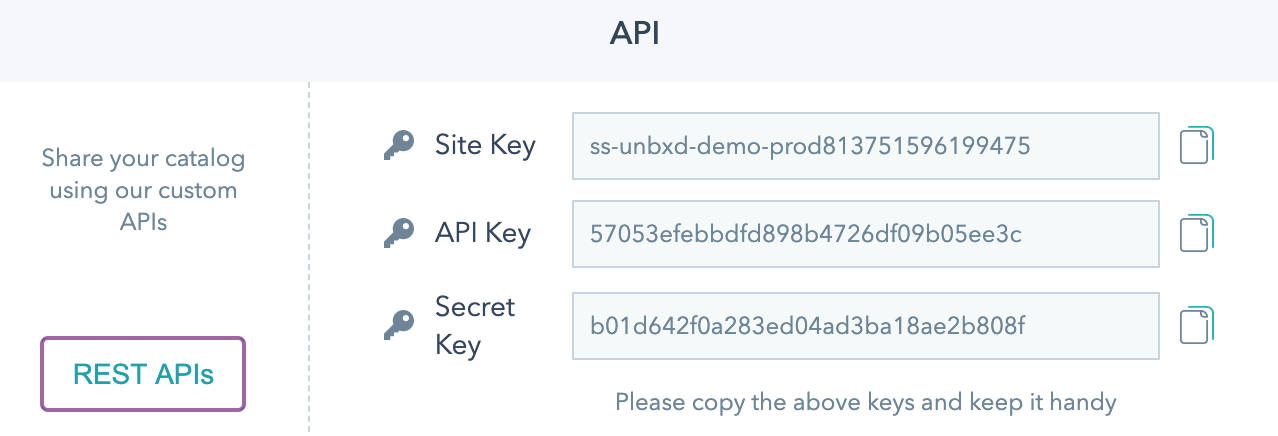
- Feed API: If the products in your catalog are more than 25K then, you can upload the catalog via our Feed APIs. Feed APIs only support the JSON file format.
- PIM: PIM allows you to upload the catalog via SFTP, URL, or directly via your computer. PIM uploads are recommended for catalog with less than 25K products. Unbxd PIM allows you to add transformations for each attribute before uploading the catalog.

NOTE: You can also import your catalog via SFTP locations. Though, which catalog will be uploaded first depends on the catalog size.
Platform Plugin
The most convenient way to upload your feed is via platform plugins. When you choose ‘Platform’ as your chosen option for uploading the catalog, you get redirected to the next page. We currently support plugins for two platforms:
- Magento
- SAP Hyrbis
If you have your eCommerce site on any of them, then select that plugin option.
Magento2 Platform
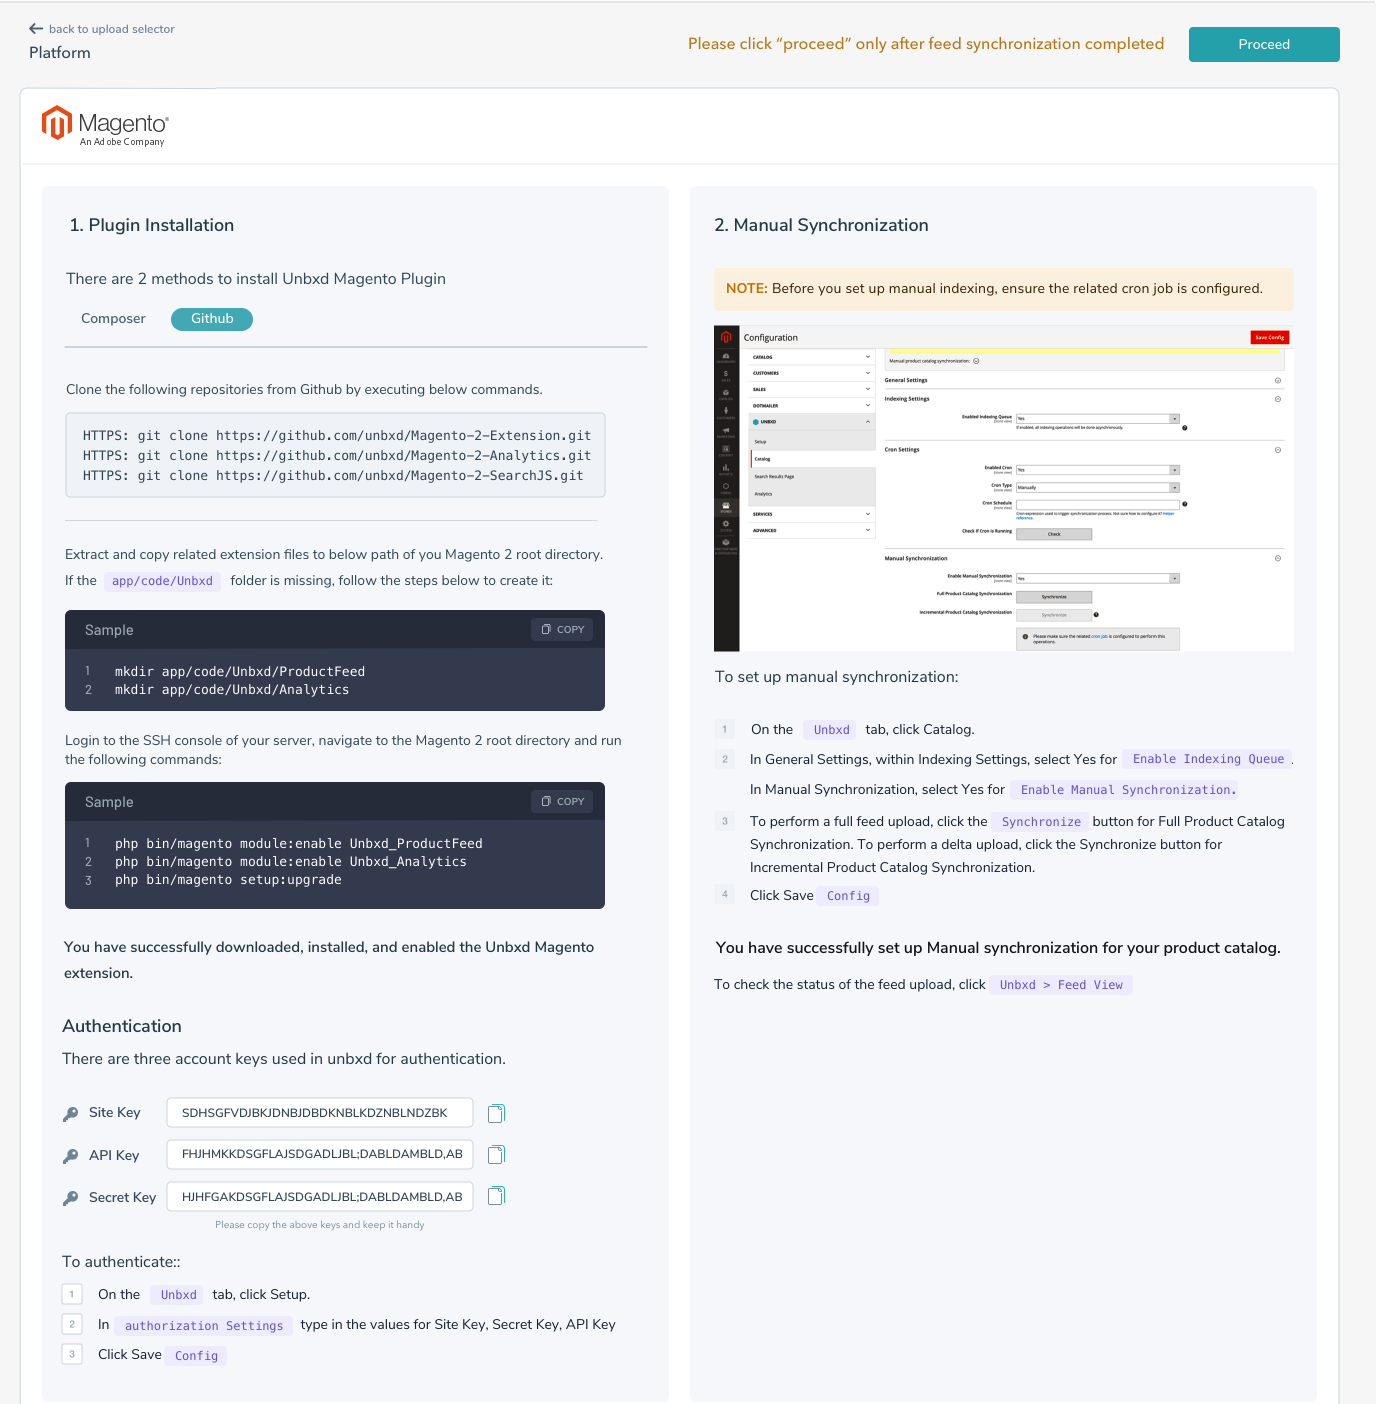
With these two steps you can upload your catalog via Magento2 platform plugin :
- Plugin Installation: Install the plugin using Composer or using our links mentioned in Github. The steps are clearly defined on the console.
- Manual Synchronization: If not, then manually sync your catalog using Magento’s site.
Once done, click ‘Proceed’. If the feed is successfully uploaded, the status changes to ‘Feed Upload is successful’.
To know more, read the Magento2 Documentation.
SAP Hybris Platform
If your site is on SAP Hybris, do the following:
- First, install the Hybris plugin by downloading the module from Unbxd’s GIT directories. Perform the steps as mentioned on the console.
- Then synchronize your feed from your Hybris site account.
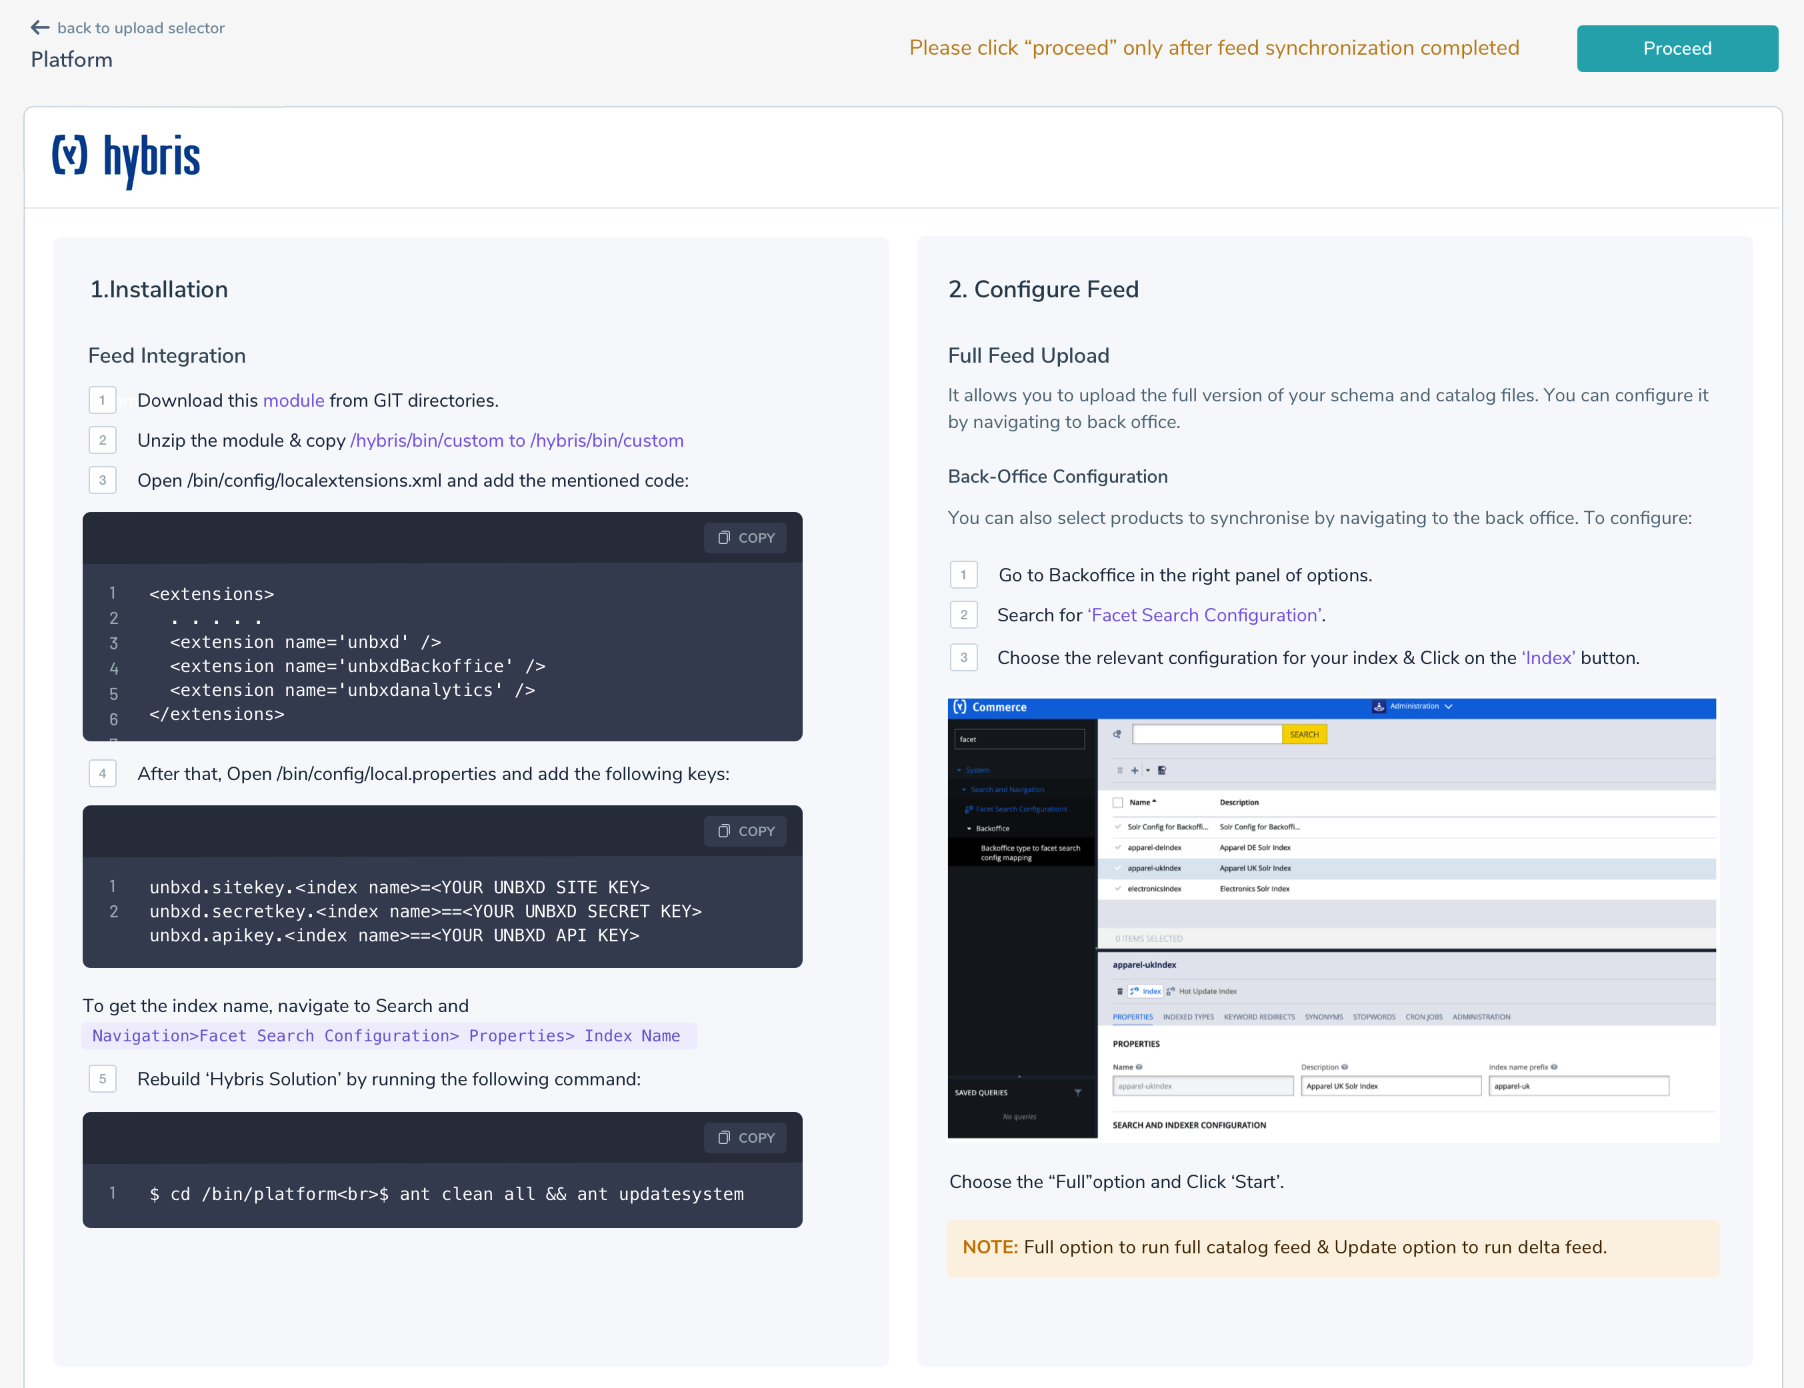
To know more, read the SAP Hybris Documentation.
Once done, click ‘Proceed’. If the feed is successfully uploaded, the status changes to ‘Feed Upload is successful’.
PIM
Unbxd PIM manages and centralizes all your product-related content and process for accuracy. While we have an advanced Extract, Transform, Load (ETL) platform in place to help with major catalog issues, we require you to make sure that some guiding principles around the catalog are followed.
Unbxd supports uploading the catalog in the following file formats:
- .csv
- .xls
- .JSON
- .XML
Uploading your feed in any of the aforementioned formats initiates the import process. You can also upload it as a zip file for the supported formats.
List of unsupported settings
But even after you decide on the file format for upload, check the following settings to avoid Feed Upload Failure or any other discrepancies:
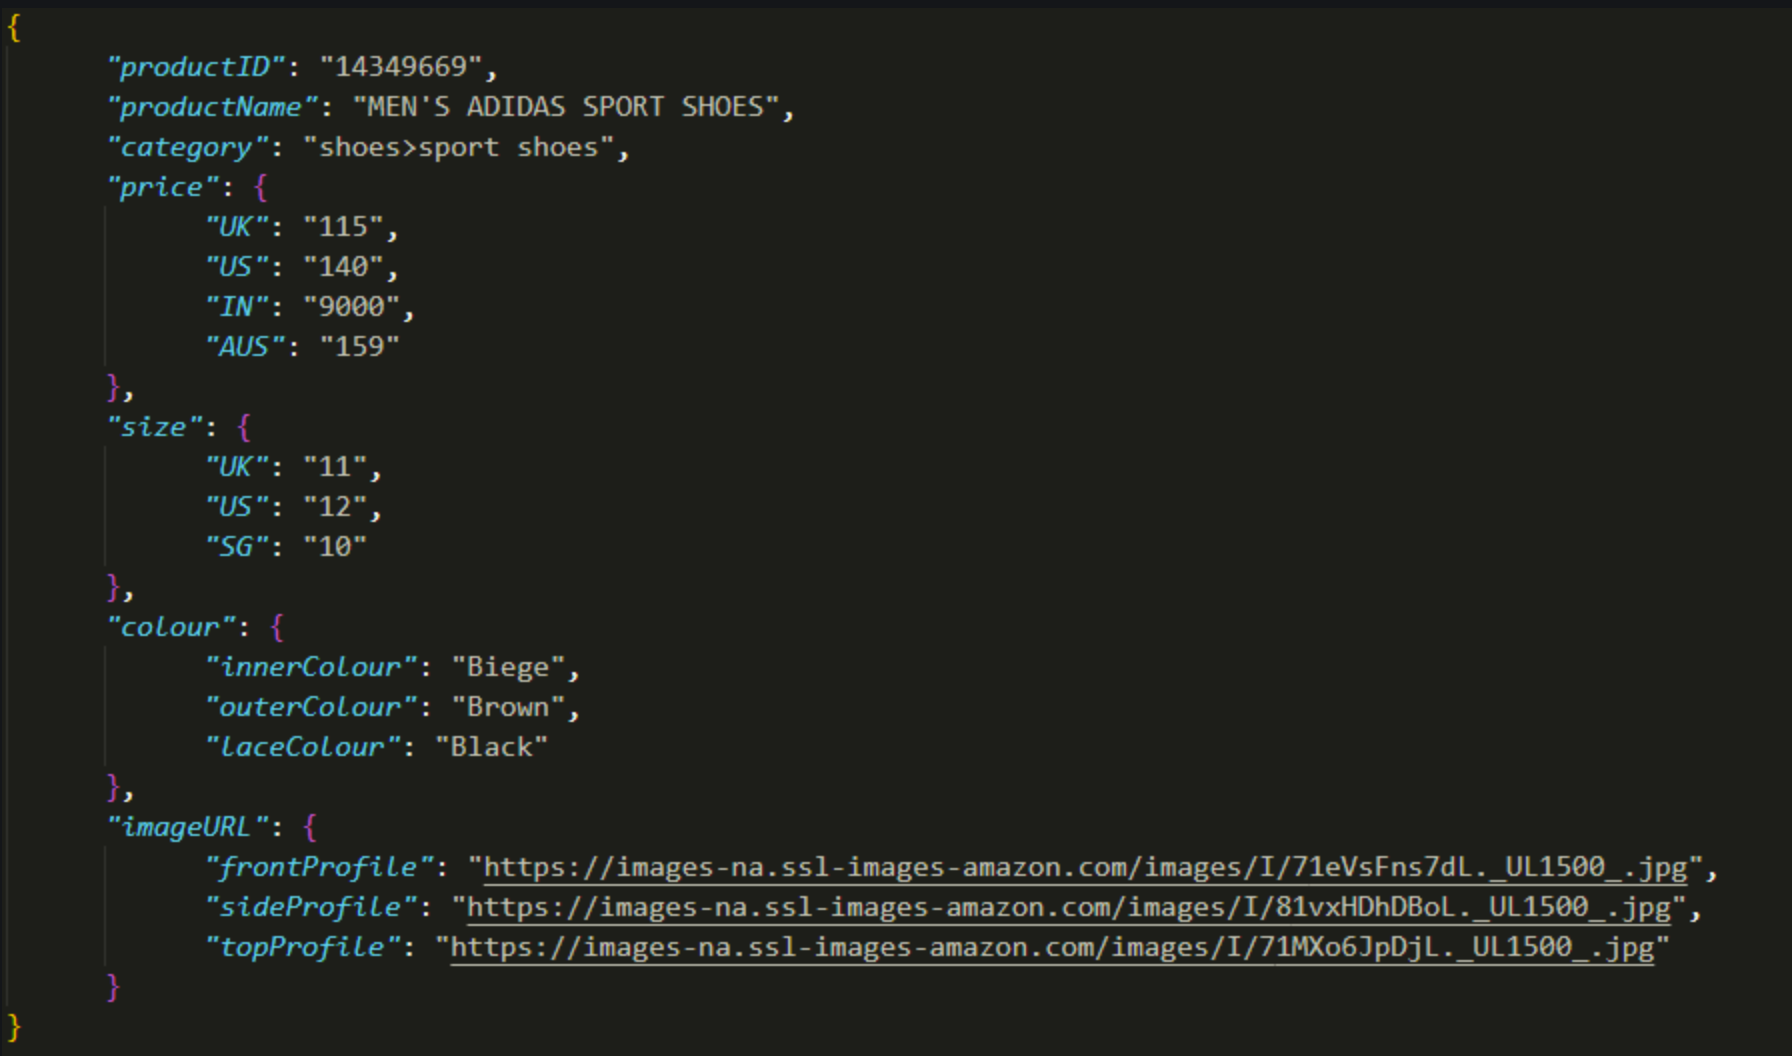
- Nested JSON, XML: Nested JSONs are the ones where an object is nested inside other objects. Our system doesn’t support such nested JSON or XML files. Our system understands the linear mapping in the JSON/XML file. To help you understand, let us look at the following example:
What Unbxd PIM supports: Fields and Values explained in a linear hierarchy. What Unbxd PIM doesn’t support:
- Missing Column Header/ Empty Column: Unbxd PIM identifies different product properties in the catalog through column header. Hence, if the column header is empty, it will not be considered.
Look at the following example for a better understanding: If the above data is uploaded through Unbxd PIM, the column ‘Image URL’ will be rejected. (highlighted above in grey color)
- A blank column in the Catalog: If a column in the catalog does not have any value, it will be discarded by Unbxd PIM. Look at the following example where a column is missing between Product_Name and Price. Unbxd PIM ignores such columns while indexing the feed.

- Multi-Files Upload: We do not support multiple file upload currently. You can upload only one file at a time which later gets merged to master PIM Data. Each feed import is treated as an independent import.
However, we can import multiple feed files parallelly via SFTP in the workflow. All the files need to have a common property to merge the properties post-import. If not, try creating a single file and uploading it. - Special Character: To define column heading, you can use any special character except “.” [dot]. Ensure that in the column header, this character is not used. Also, ASCII 16 characters in headers are not supported, like trademark icon, regs icon, smileys, emojis.
Examples of acceptable Column Header names: product_name, user-name, etc.
Examples of unacceptable column header names: product.name
When you upload the catalog and our onboarding engine has indexed it. You are redirected to the next screen to map your fields with the Unbxd defined ones. Let’s look at the various properties and their mapping:
- Map the Mandatory properties: Unbxd PIM allows you to map the field properties. First, we map the two important properties:
Product Id: The ID that uniquely identifies products in your catalog is defined as the Product ID. This can also be defined as SKU ID or Unique ID.
Product Name: The name or title you use to define your product. - Mark Optional Properties: All the other properties except Product Id and Product Name are considered as optional properties. You may or may not map these properties.
- Variant Handling (Parent Id is a must): Variants are handled differently than the parent product. The properties of the parent product are the same for the variants except for the value of which they are variants.
Variants have a reference to the Parent_ID and all the properties are automatically mapped, so we don’t define them again to avoid redundancy. - Multivalue Separator: When a single property may have various values, then we define the separator character in the box against ‘Multivalue Separator’ to separate all the values. The preferred signs are ‘,’ (Comma), : (colon),; (semi-colon), – (Dash). For Ex. Color: Red, Green, Yellow. Click the ‘Add Transformation’ sign against any attribute to add separators.
Tree/List Separator: Similarly, if you have a category of products, then specify the separator character in the box against ‘Tree/List Separator’ to let the engine decode it as a hierarchy. The preferred signs are ‘,’ (Comma), : (colon),; (semi-colon), – (Dash), ‘>’ (The greater by sign)
NOTE: Mention the values that you have added under this section in the FTU flow post the indexing process.
Feed APIs
To push the feed via APIs, follow these steps:
- Prepare your Schema: Your product catalog contains a list of all your products and their attributes. A schema defines the properties of the attributes in your product catalog. For instance, when your catalog has fields like ‘title’, ‘size’, ‘price’, and ‘brand’, a schema file helps your search engine make sense of the information within such fields in the catalog.
- Prepare your Catalog: Structure your catalog file that contains a list of all your products and its attributes. The information associated with products is managed by search engines using attributes or fields. The attributes contain information about the properties of the product.
- Upload Feed: Once you’ve identified the attributes you need to upload, you can upload it using our Feed APIs. A product catalog may have multiple feed files, however to power your eCommerce search, we need your unified product feed file in JSON format.
For more information on these, refer to the Feed APIs.
Once the feed is pushed, click ‘Proceed’.
If the feed is uploaded successfully, the status displays “Feed Upload is Successful”. You can click ‘Setup Search’ to move forward with the setting up of the search onto your site.
If the feed upload failure occurs due to an incorrect mapping or server issues, a message displays ‘Feed Upload is Failed’. Retry uploading the feed and proceeding with it.
Dimensional Mapping
Dimensional Mapping page allows you to map the fields present in your catalog to the Unbxd recognised dimensions. Dimensional mapping is done because:
- The console needs dimension mapping for the Preview feature in merchandising page and website preview page. These functionalities require a mapping for imageURLand Product title dimensions to work properly.
- During onboarding, dimension mapping helps in improving the recommendations for configuration.
How to map fields to Dimensions?
To map the fields from your catalog to Unbxd defined ones, follow these steps:
- After the feed is uploaded successfully, click ‘Dimensional Mapping’ to map the relevant fields.
- Now, you see a list of Unbxd defined fields. Next to it, we have a drop-down box populated with the fields from your catalog. Map the relevant fields against the Unbxd defined ones.
- Map the mandatory fields like UniqueId, imageURL, and Product title.
If you don’t have the field for the mandatory fields,
NOTE: Only one field in the catalog can be mapped against each dimension. Some dimensions also support mapping of variant fields.
NOTE: In case, you don't see a field in the drop-down list, it is probably because of a mismatch in the DataType of the field. Re-visit your schema file and update the datatype of the field missing from the screens.
Setup Search
And the final step involves, ways to set up your search features incorporated with AI recommendations. We scan through the catalog to calculate the attributes that will be made searchable or considered as facets.
Our AI system also has diversified knowledge of catalogs from different verticals which makes it intelligent to identify the probable relevancy settings. We use this to set the relevancy of your site automatically which reduces the zero-result queries and improves the recall.
NOTE: These settings can be changed from the console later.
Searchable Fields
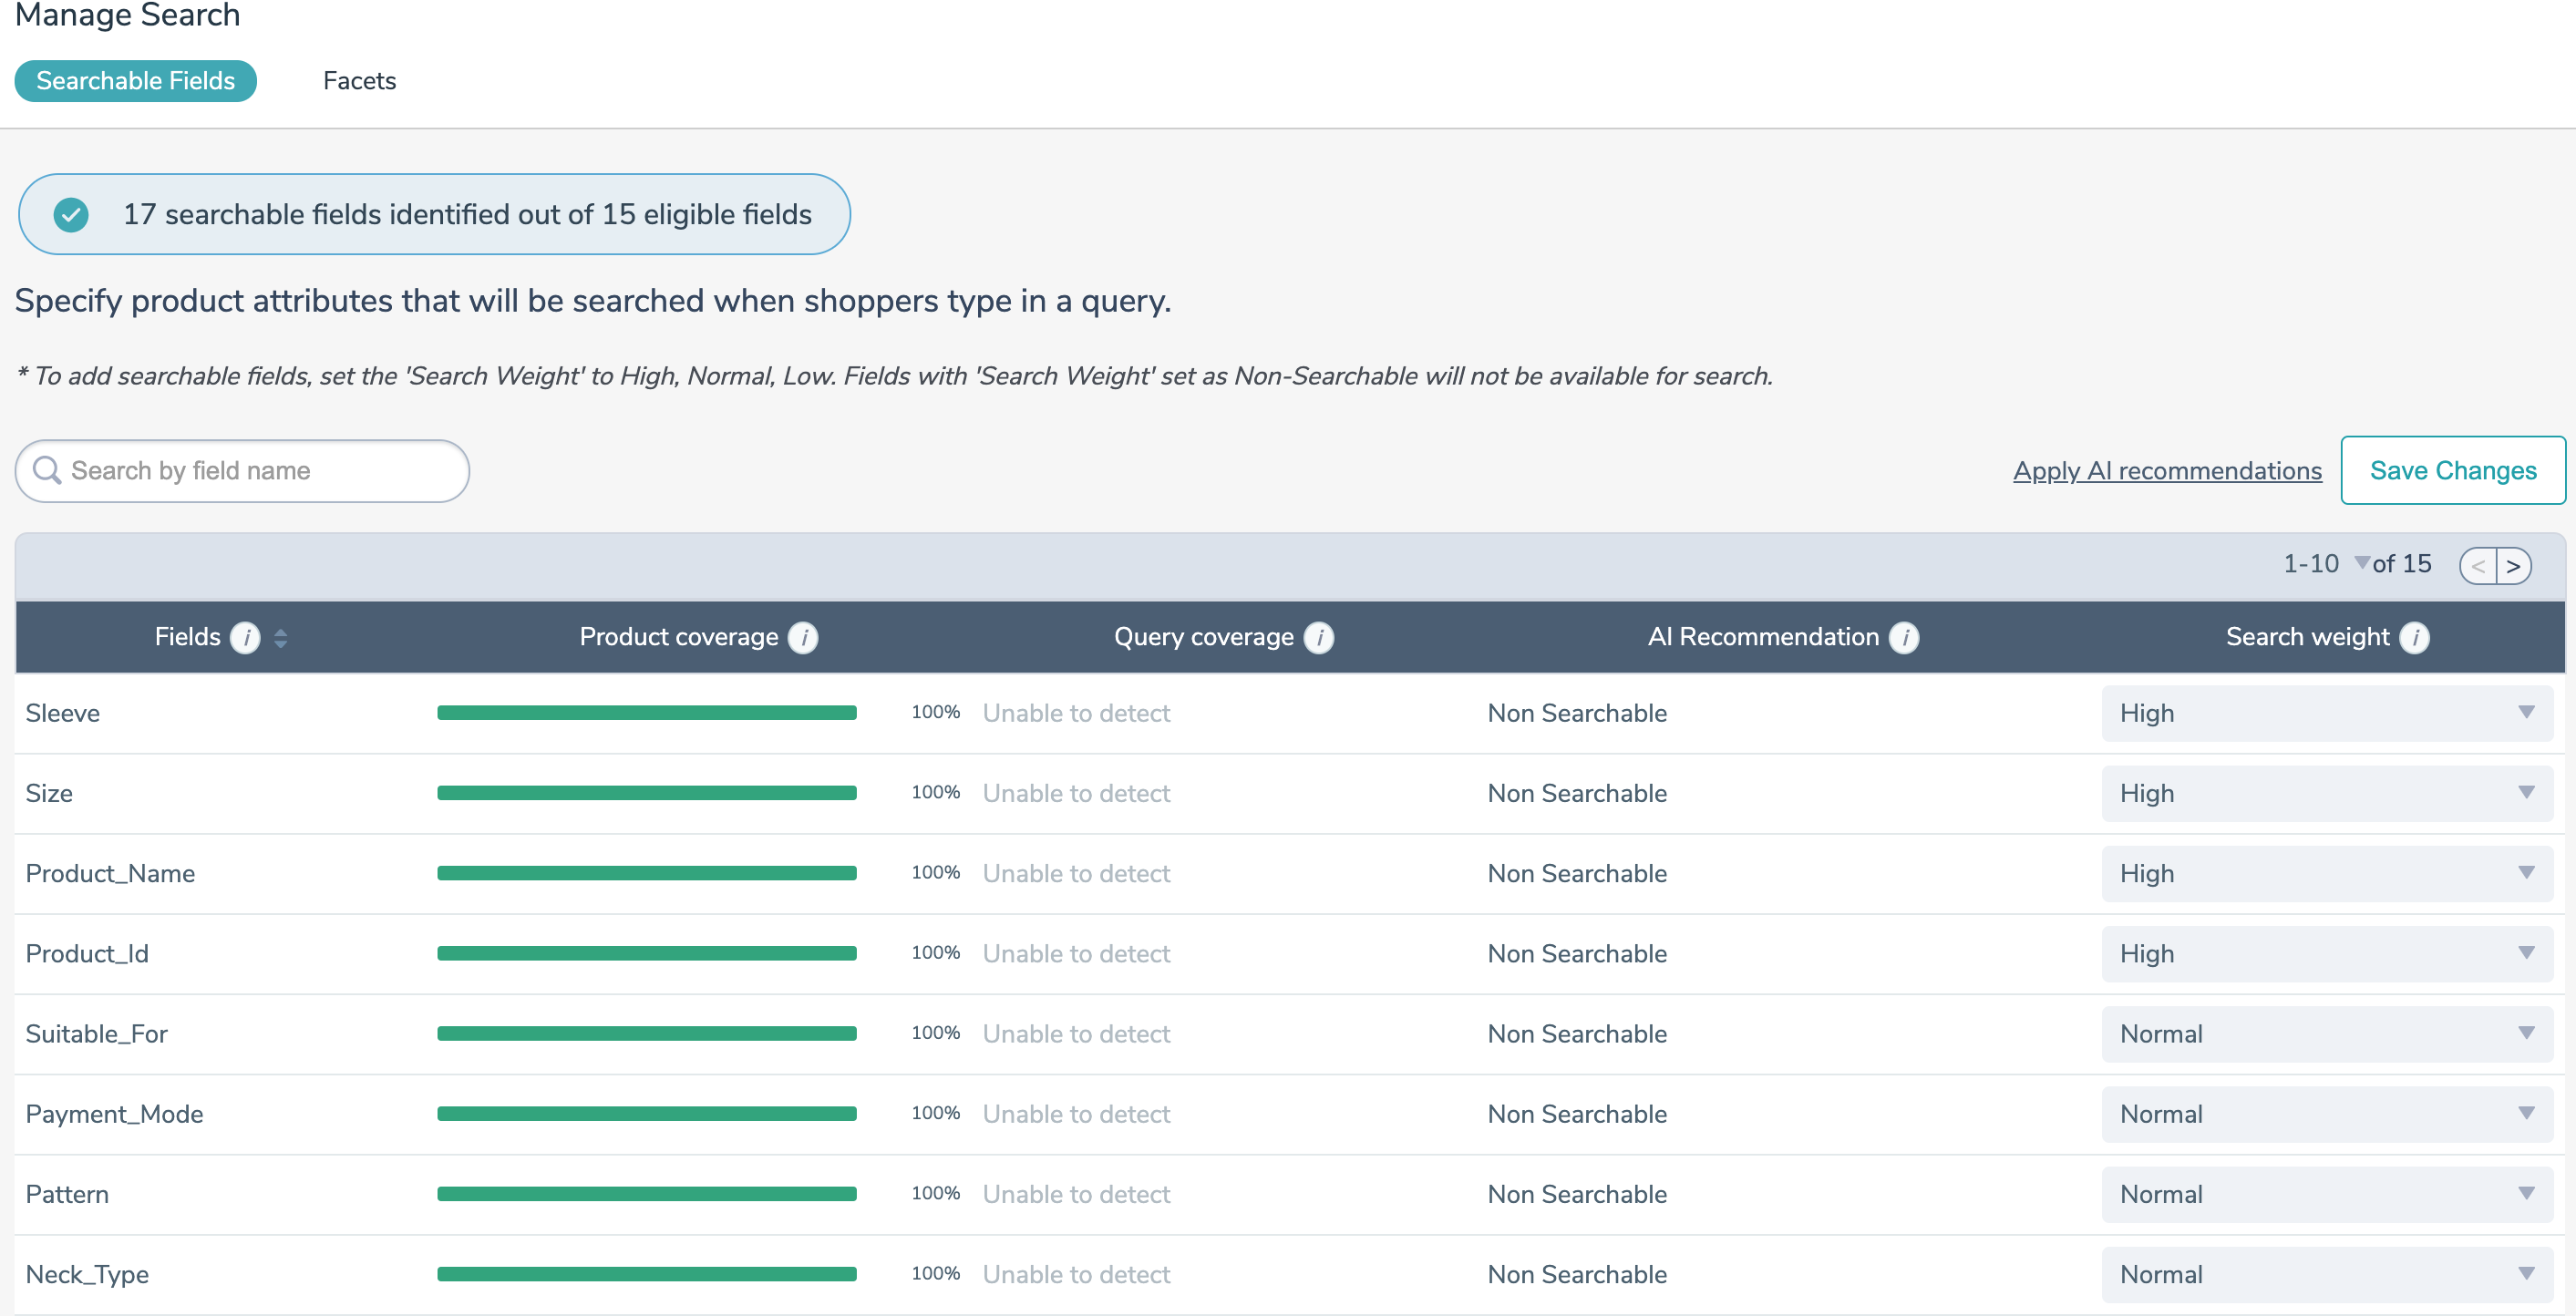
Searchable Fields help in identifying the attributes that are searched while searching for a query. Our AI engine identifies the searchable fields upfront from the uploaded catalog. You can validate the recommendations and edit it later accordingly.
Searchable field: When you define a product attribute (like color) as a searchable field, it affects the search results when a shopper searches for a product.
Non-Searchable field: If an attribute is set as ‘Non-Searchable’, then it doesn’t affect the search results, therefore, simplifies the search results by showing only the relevant ones.
For instance, if the ‘color’ attribute of the corresponding products is added as a ‘High Searchable’ attribute then shoppers searching for ‘Blue Shirts’ will get the exact results.
The searchable fields are also assigned search weights (High, Normal, Low) based on their priority of affecting search results defined by our AI engine.
|
Weightage |
Description |
|
Non-Searchable |
Attributes that shouldn’t affect the search results should be tagged as ‘Non-Searchable’ |
|
High |
When an attribute is marked as a top priority to affect the search results |
|
Medium |
When an attribute is marked as a second-top priority to affect the search results |
|
Low |
When an attribute is marked as the lowest priority of all to affect the search results |
Our AI recommendations calculate the searchable fields and their weights based on the following parameters:
Tip: Descriptive fields with generic information (i.e. information that does not change with each SKU) should not be included in-spite of high query coverage.
- Product Coverage: Product coverage tells you how many products in the catalog will be affected if this field is made searchable.
- Query Coverage: Query coverage is an indicator of how frequently customers are using the information in this attribute while searching for products.
- AI recommendations : The recommended search weight for the fields decided by the AI based on quantitative (query coverage, product coverage) and qualitative factors
Facets
Facets are created on site-level to narrow down search results for the shoppers for their intended query. If shoppers type a query ‘Books’. Facets like ‘Genre’, ‘Author’, ‘Format’ get reflected on the Product Display Page(PDP). When shoppers select facets, they further reduce the number of products on the results page.
Unbxd AI recommends a list of facets that is generated by gathering context from a million catalogs spread across multiple verticals.
Select facets from the list of recommended facets to enable them.
You can add a facet using ‘Add Facet’ by selecting the attribute, name, order (count or alphabetical), length, and facet type (Text or Range). You can edit an existing facet by selecting any of them.
If you want the facets to be displayed on the PDP, then choose ‘Enabled’ or else ‘Disabled’. To know facets in detail, refer to the document for Facets.
NOTE: Only the Facets with the status "Enabled" are returned in the API response.
Content Relevance
To understand the shoppers’ queries better, Unbxd AI suggests a set of synonyms, phrases, concepts, and stop words relevant to the queries. Such phrases restrain the site to throw ‘Zero Results’ as well.
Quick start your Unbxd search by uploading your own thesaurus/dictionary to help us understand your catalog. The Content section also allows you to preview Unbxd suggested dictionaries, add your own dictionaries to complement Unbxd generated dictionaries.
- Synonyms: They help in increasing the scope of a query and improving recall (i.e. the number of search results) by letting our systems know which products to look for in catalog for a particular query.
- Concepts: Concepts or mandatory terms are used to identify product types being searched for in a query. Unbxd algorithms use this information to restrict the results set to the relevant product type when we are unable to detect exact matches for a shopper’s query.
- Phrases: They help Unbxd algorithms understand products described using more than one word and help in resolving conflicts between two possible categories of products that might be relevant for a multi-word search query. For example
- “Shoe Polish” Phrase must match with “Polish” products
- “Mobile charger” Phrase must match with “Chargers” for mobile
- Stemming: It is the process of bringing a word to its root in order to help our algorithms search for different forms of the same term. The stemming section in content allows you to specify the stemmed version of a token to override our default stemmer. For example, In fashion websites, “Leggings” must be stemmed to “Leggings”. Default stemmer will stem “Leggings” to the root word “Leg”
- Stopwords: This section allows you to define a list of terms/stopwords that should be removed while searching for products. For example, ‘other’, ‘some’, ‘such’, ‘non’, ‘not’ are some of the stopwords for the English language
- Spellcheck: This allows you to explore how our to spell-check algorithms work in case of search and autosuggest. You can enable/disable spellcheck suggestions in search from here.
NOTE: Once configurations are completed, click “Start Indexing” to push the settings and get access to a Sandbox. Once the indexing is done, you will have your site search engine all up and ready! Access Unbxd’s Search Console for further other features or tracking Insights.
Autosuggest
Autosuggest delivers query suggestions to the shoppers while they are typing for a query on the search bar. Having relevant autosuggest results lets the shoppers make a quick decision within a short span of time.
With Unbxd’s Autosuggest, you can configure the type of suggestions you want to display and also the position of autosuggest. To display the autosuggest, you can choose any of the available template to display the autosuggestions on your site. Once done, you can move ahead with configuring the autosuggest type.
You can configure any of the following six types of autosuggest:
- Keyword Suggestions: Keyword suggestions are intelligent suggestions that are generated from the catalog. Configure it by selecting the attributes from your catalog that would display as keyword suggestions.
- In-Field Suggestions: In-field suggestions are product suggestions as product categories when shoppers type the search query. Configure it by selecting the attributes from your catalog that would display as in-field suggestions.
- Top Queries: Query suggestions generated based on the most searched queries by the shoppers on your website. Configure it by specifying the number of top queries that you wish to display as query autosuggestions out of the available top queries.
- Popular Products: Popular products that are performing well on your site (searched/added to cart/sold). Configure it by specifying the attributes that should be searched for displaying query suggestions and also specify what should be displayed.
- Trending Queries: Query suggestions generated by capturing trends in shopper’s searched query activity over a short time interval. Enable/Disable display of popular products using Autosuggest SDK.
- Promoted Suggestions: Promoted suggestions to boost queries based on your requirements. Enable/Disable display of popular products using Autosuggest SDK.
Preview & Integrate Search
After you’ve set up your site search, the next step is to preview and then integrate the search. The Preview screen lets you see all the features and changes that you have integrated before publishing them. For this, Unbxd allows you to select a template from a pool of templates (designed for Product Listing Pages) with various features to display your products. Selecting a template saves you time and refrains you from customization pain.
Benefits of having templates:
- You can test Unbxd Search using a template that is similar to your website/vertical
- Integrate Unbxd search and its functionalities by simply downloading and integrating the Template UI Kit.
Let’s learn how to select a template for your site.
Selecting a Template
A template displays a demo of the Product Listing Page (PLP) with various properties customizable according to your site’s requirements.
To select a template:
- Click Live Preview after setting up the search. You can see a demo Product Listing Page (PLP) has been already set up with a default Unbxd template. On the console, click Website Preview on the console dashboard to access the preview page.
- Even though a default template is chosen, we have a pool of other templates for you to select from based on your requirements. If you wish to see more templates, click See available templates.
- A list of available templates opens up, out of which a few are marked as Recommended and displayed on the top. Recommended templates are the ones that Unbxd selectively curates for your business vertical and catalog.
- Click Template Info to view the key features of the template.
- Once you select the template of your choice, click the template to apply it.
Dimensional Mapping: Each template needs different attribute mapping to let the features function correctly. In case, you haven’t mapped any essential attribute required for the template, a pop-up will ask you to map the unmapped attributes. Once done, click Save changes.
NOTE: The mapped fields are globally applied across the Unbxd search.
The applied changes will be visible on the demo Product Listing Page (PLP).
We also support the grouping of variants on swatches or size attributes in the templates. To group the variants on swatches, map the field containing the swatch image URL or color hex code in your catalog to the Unbxd Swatch field.
Whenever you preview your site after the template selection, your site will automatically open up in the applied template.
Integrating a Template
The final step in the process of Onboarding is to integrate Unbxd Search to display search results for shopper’s queries. Unbxd offers RESTful APIs & SDKs for different platforms to allows easy integration of our Search features.
SDKs
Use Unbxd SDK to integrate Unbxd Site Search by following just two steps.
- Click the Download UI kit.
- Unzip the package and open the index.html file in your browser to view the search results landing page for your catalog with the Unbxd default template.
To know more about the Search SDK configs and the different possible options, read the JS SDK documentation here.
Platform Plugins
If your eCommerce is based on any platform like Magento or Hybris then you can use our native plugins:
- Magento: Using our Magento plugin, you can enable search on the plugin and preview the demo site using the steps defined below:

- Hybris: Using our Hybris plugin, you can enable search on the plugin and preview the demo site using the steps defined below:

Integrate APIs
Use our inbuilt APIs to integrate any Search functionality via:
- Search API
- Autosuggest API
- Did this answer your question?
On this Section
- To create a Query Rule
- To Edit a Query Rule
- Delete a Query Rule
- Campaign States
- Create Campaigns
- Edit Campaigns
- Preview Campaigns
- Duplicate Campaigns
- Delete Campaigns
