- Features
- Searchable Fields
- Libraries
- Facet Features
- Types of Facets
- Configure Facets
- Field Mapping
- Field Properties
- Configure Site
- Profile
- Team Management
- Sites
- Global Coverage
- Disaster Recovery
- Features
- Template Selection
- Keyword Suggestions
- In-Field Suggestions
- Top Search Queries
- Popular Products
- Trending Queries
- Promoted/Blacklisted Suggestions
- Real-time Preview
- Instantaneous Publishing
- Ranking Insights
- Clickstream Data
- Boost/Bury
- Sort
- Slot
- Pin
- Filter
- Landing Pages
- Redirects
- Set Banners
- Ranking Insights
- Create a Site Rule
- Managing Field Rules
- Managing Query Rules
- Campaign
- A top-down approach
- Faster and simpler
- Relevant Metrics for better analysis
- Interactive and easy-to-view preview
- Feature-filled Listing Page
- Promotions
- Banners
- Facets
- Redirects
- Add New Promotions
- Boost/Bury
- Sort
- Slot
- Pin
- Filter
- Landing Pages
- All Queries
- Query-based Banner
- Field-based Banner
- Creating Field-based Facets
- Create a Site Rule
- Overall Performance
- Query Report
- Zero Result Queries
- Product Reports
- In-field Suggestions
- Keyword Suggestions
- Top Search Queries
- Popular Products
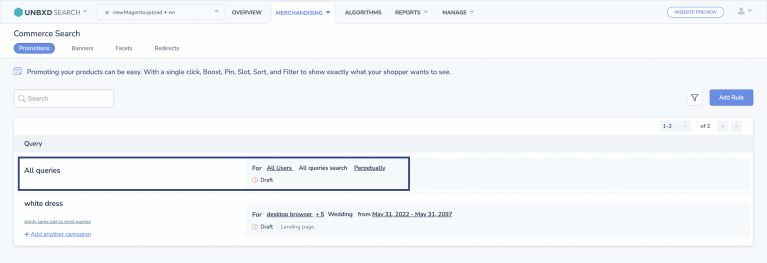
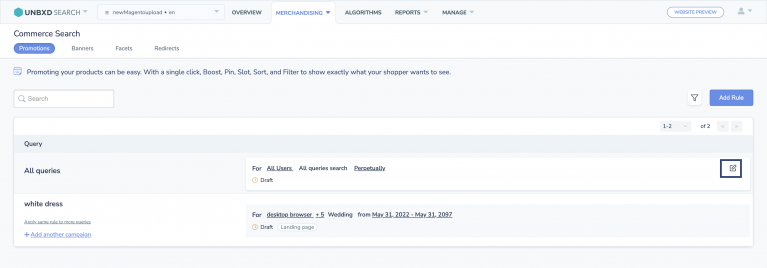
- After logging in to the UNBXD console and selecting the site of your choice, click Merchandising.
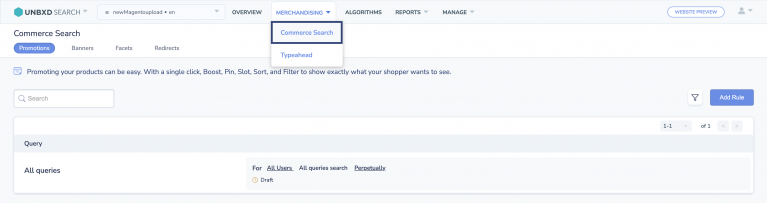
- In the dropdown menu, click on Commerce Search and navigate to Promotions.
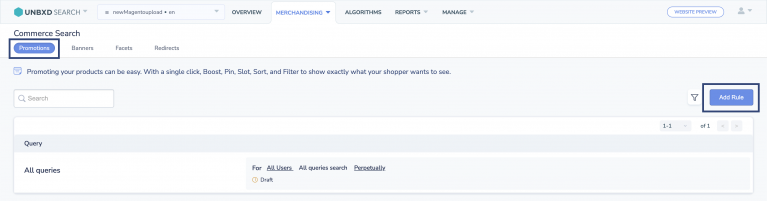
- From the Promotions listing page, click Add Rule.
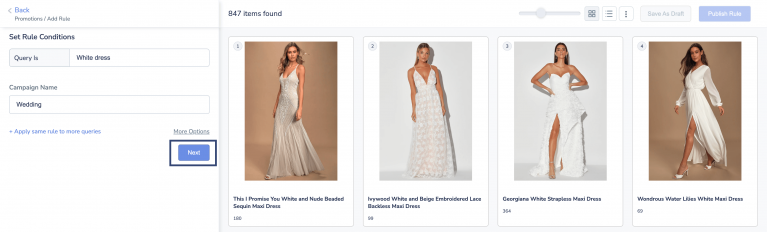
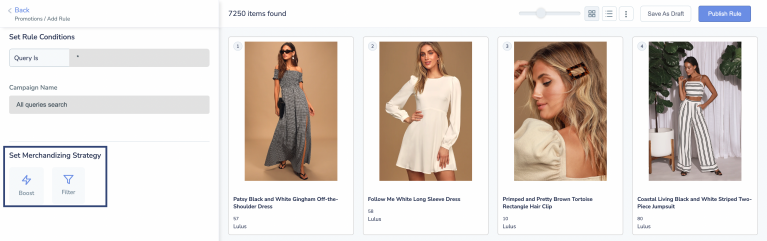
- On Query Is, enter the search query for which you want to manipulate the results by implementing a merchandising strategy.
- After entering the search query, provide the Campaign Name. Given that you can have multiple campaigns for a single query, the Campaign Name will make identifying a particular promotion easier.
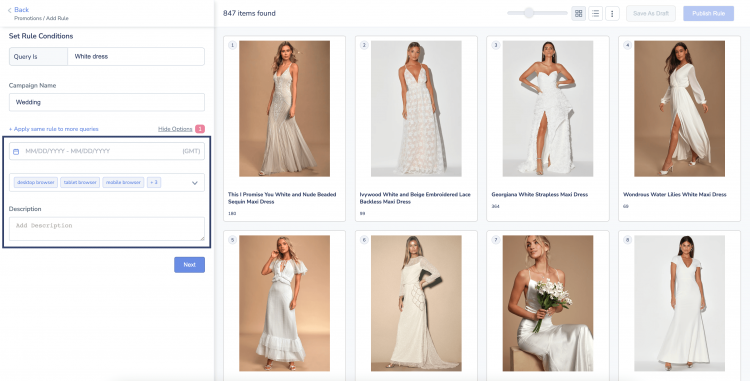
- Click + Apply same rule to more queries to enforce the same rules for any other queries (apart from the one defined in Query Is).
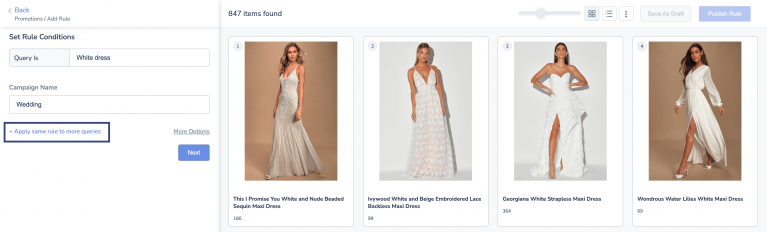
- You can also set your campaign’s start date and end date, and target users based on the device they use by clicking More options.
- After providing all the required details, click Next.
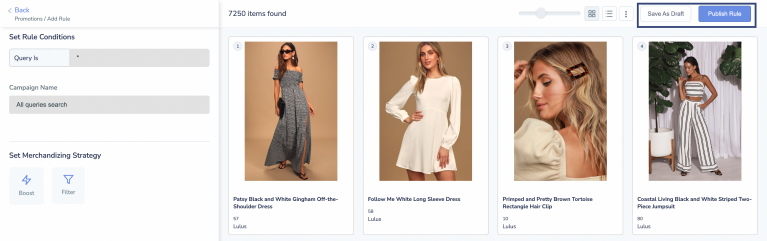
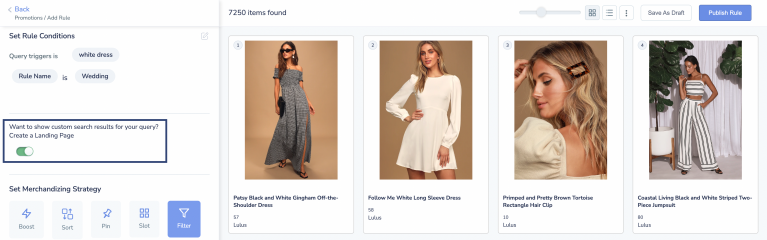
- If you want to show custom results for a search query, toggle the Create a Landing Page option to ON.
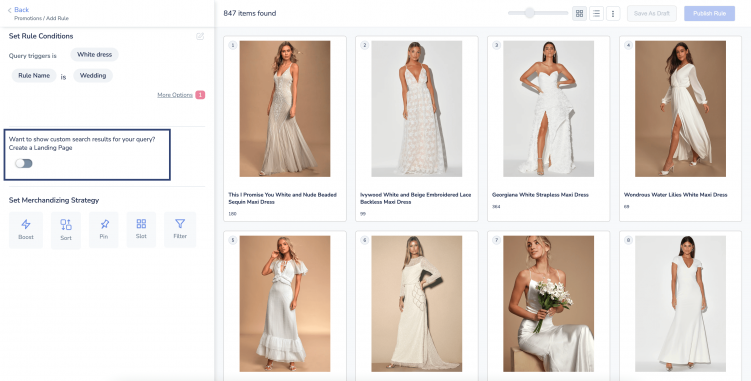
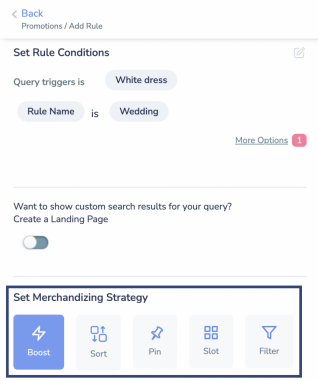
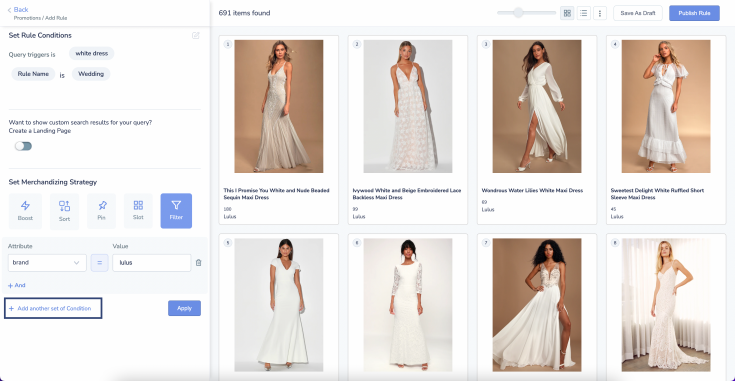
If not, continue to Set Merchandising Strategy. - Under Set Merchandising Strategy, you can configure one or more rules using the Boost, Sort, Pin, Slot, and Filter options.
- After adding a rule, you can add more by clicking + Add another set of Condition.
- After adding the conditions, click Apply.
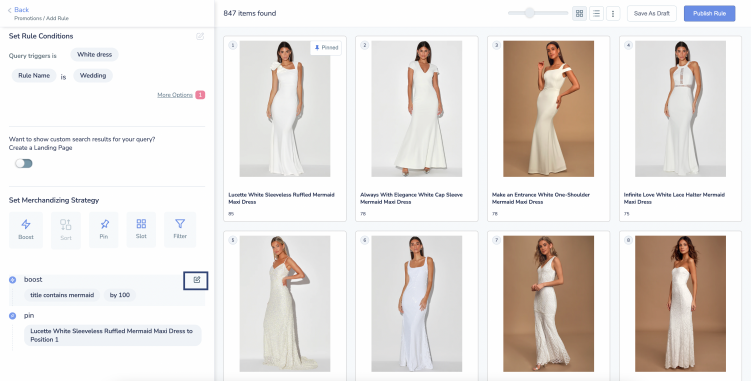
- You can also edit the set conditions by hovering over the respective rule and clicking the Edit icon.
- Once done, you can choose to save the promotion as a draft by clicking Save As Draft or publish it live immediately by clicking Publish Rule.

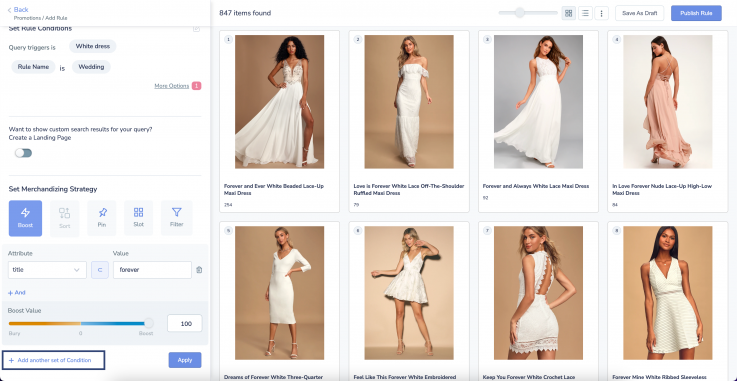
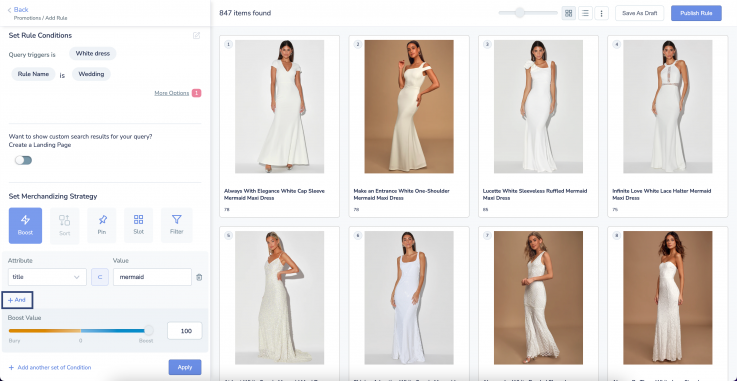
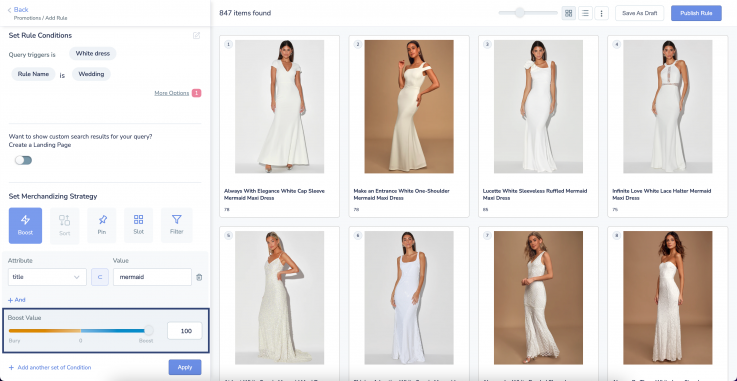
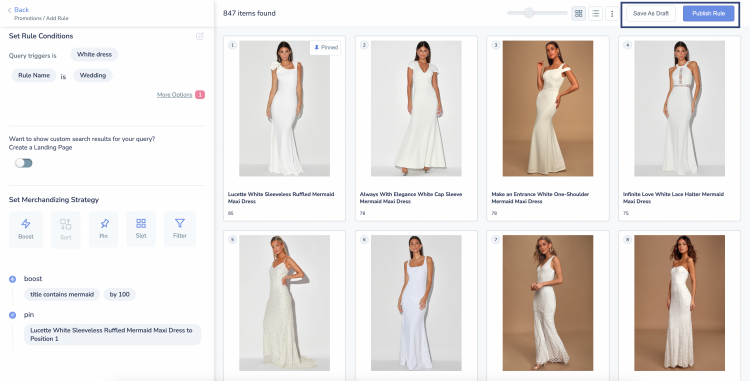
- Navigate to the Set Merchandising Strategy section and click Boost.
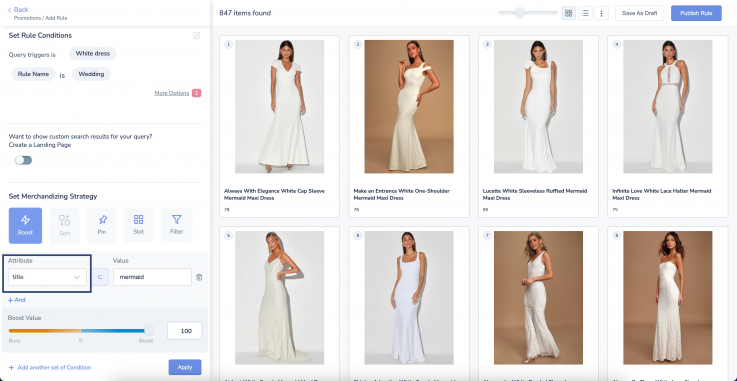
- Select an Attribute, Comparator, and Value to set your rule.
- Set a Boost Value. Boost Value ranges from 1 to 100 and Bury Value ranges from -100 to -1. Setting the Boost Value to 0 will bring out any changes.
- Once done, you can
- Add more Boost conditions by clicking + And
- + Add another set of conditions with a different option, or
- Click Apply.

- Add more Boost conditions by clicking + And
- Save the promotion as a draft by clicking Save As Draft or publish it live immediately by clicking Publish Rule.

An attribute is the field name you want to target in a rule. They can be of text value or numeric value. For example, attributes like color, gender, and fabric will contain text values such as red, men, and satin (among others) respectively. And, attributes like rating and price will contain numeric values such as 4 and 350 respectively.
Comparators help set the condition by drawing comparisons between the attribute and its value. Essentially it says, if an attribute contains/is equal to this particular value then boost/bury the products that fulfill this condition. For example, if Brand equals Nike, then Boost the products by 100.

Boost Value helps you determine the level of promotion/demotion you want for the products satisfying the set condition. If the Boost Value is less than 0 (in the negative), it will bury the products. If the Boost Value is more than 0 (in the positive), it will boost the products.
Initially, with the default Boost Value as 0, there will be no changes in the search result. But as you increase or decrease the value, the products satisfying the set condition will start to get boosted or buried.
For example, if your condition is Color equals Red, then
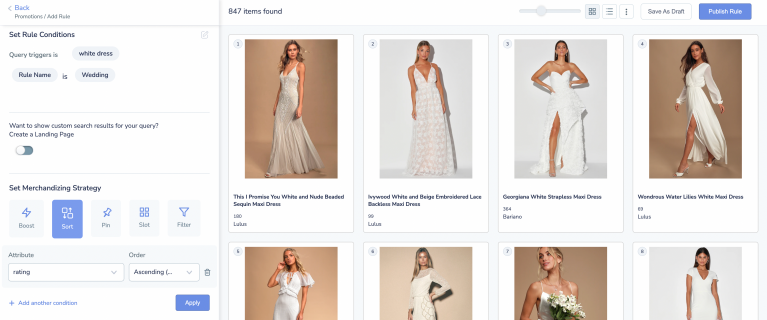
How to implement Sort?
- Navigate to the Set Merchandising Strategy section and click Sort.
- Select the Attribute you would like to set the rule for and the Order of sorting.
- Once done, you can
- + Add another set of conditions with a different option, or
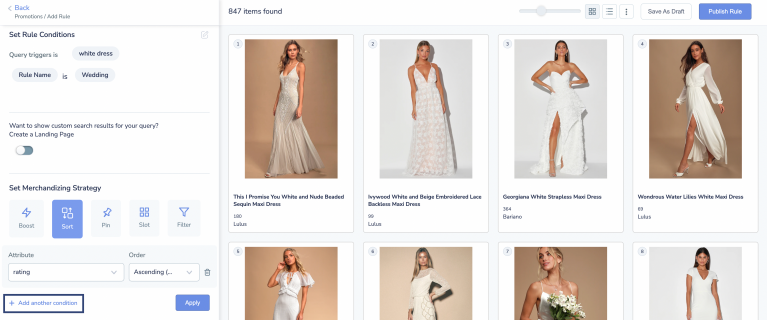
- Click Apply.
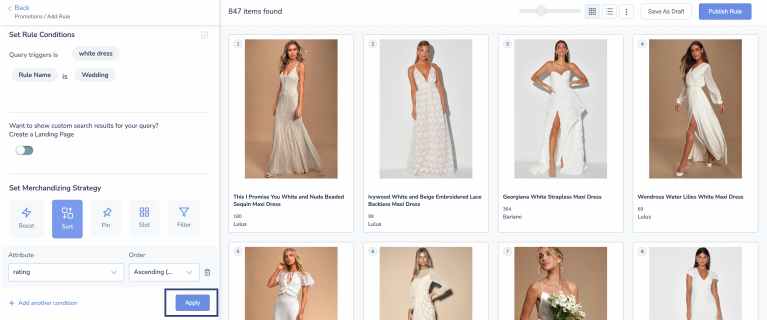
- + Add another set of conditions with a different option, or
- Save the promotion as a draft by clicking Save As Draft or publish it live immediately by clicking Publish Rule.

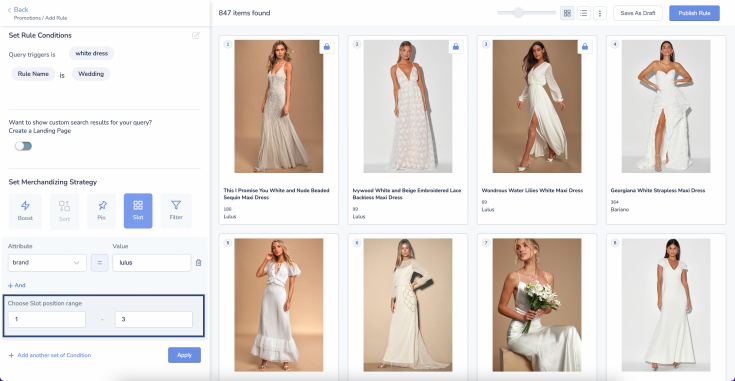
How to implement Slot?
- Navigate to the Set Merchandising Strategy section and click Slot.
- Select the Attribute, Comparitor, and the Value you would like to set the rule for.

- Choose the range of positions you want to Slot your products in.
- Once done, you can
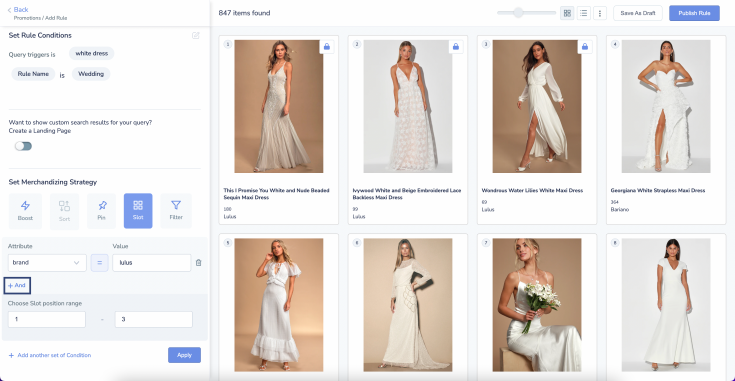
- Add more Slot conditions by clicking + And
- + Add another set of conditions with a different option, or
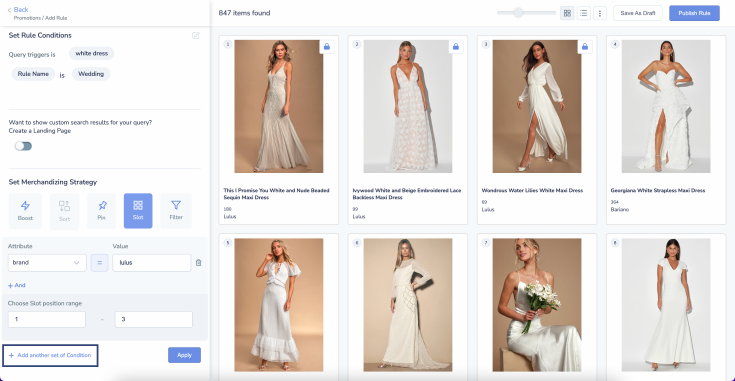
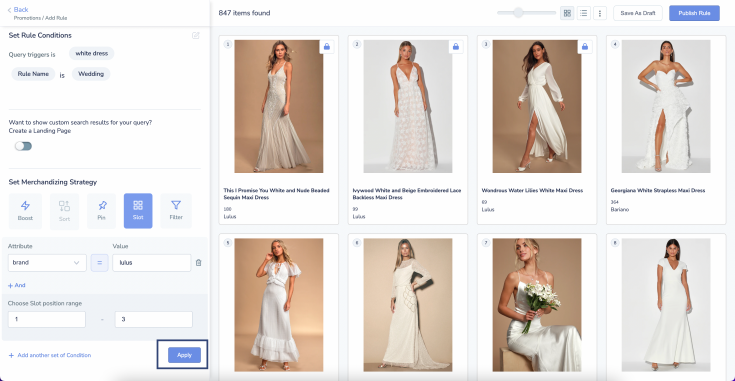
- Click Apply.
- Add more Slot conditions by clicking + And
- Save the promotion as a draft by clicking Save As Draft or publish it live immediately by clicking Publish Rule.

How to implement Pin?
- Navigate to the Set Merchandising Strategy section and click Pin.
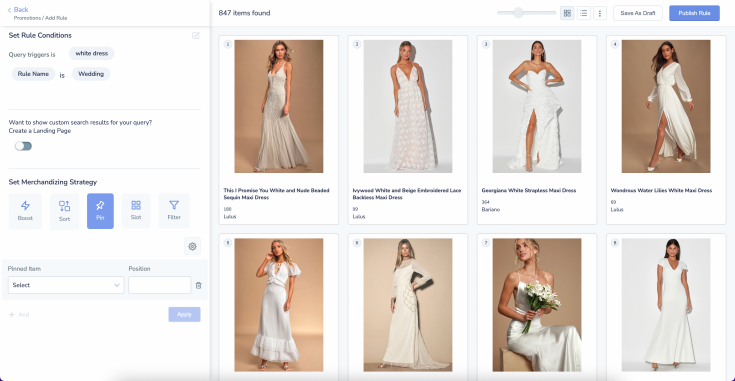
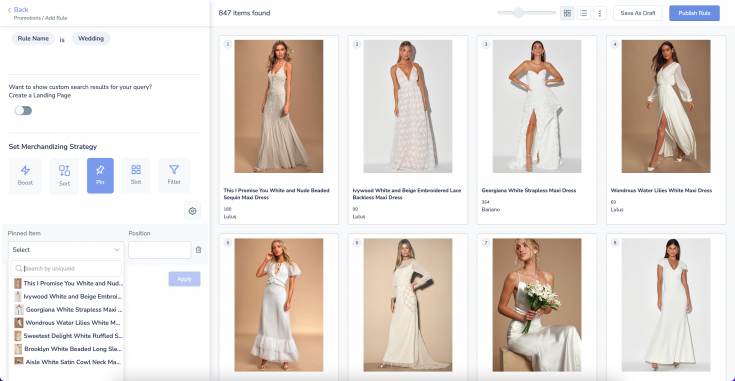
- Pin being specific to particular products, there are no conditions that need to be set. Simply enter the uniqueID of the product you would like to Pin.
- Enter the Position you want to Pin that particular product in.
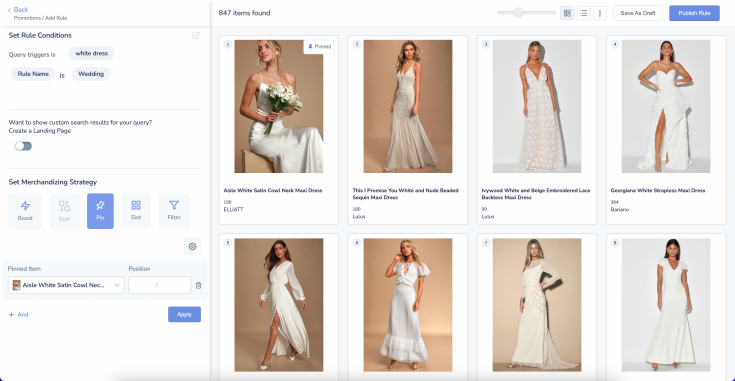
- Once done, you can
- Add more Slot conditions by clicking + And, or
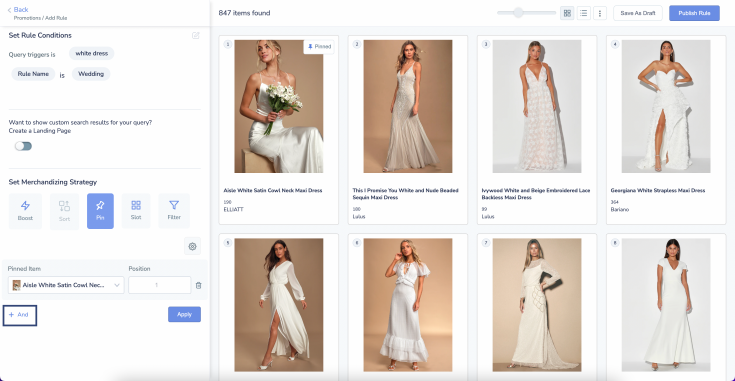
- Click Apply.
- Add more Slot conditions by clicking + And, or
- Save the promotion as a draft by clicking Save As Draft or publish it live immediately by clicking Publish Rule.

- If you see the product you would like to Pin in the instant preview, simply drag and drop the product to the Pin position.
- Repeat the same for as many products as you prefer.
- Once done, save the promotion as a draft by clicking Save As Draft or publish it live immediately by clicking Publish Rule.

- In the instant preview, if you hover over a particular product, you will notice a Pin icon. Simply click the icon to Pin that product in the same position as it existed.
- Once done, save the promotion as a draft by clicking Save As Draft or publish it live immediately by clicking Publish Rule.

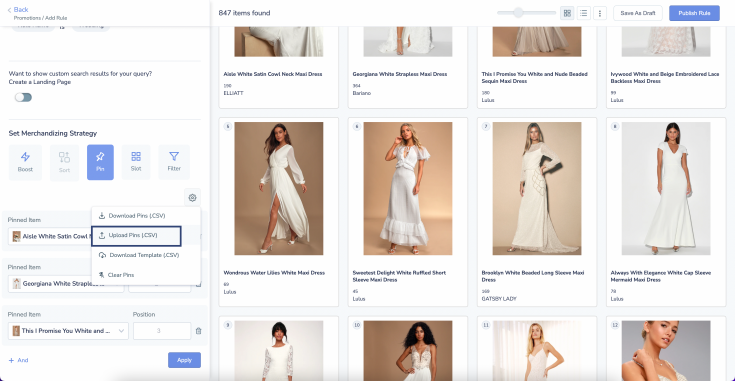
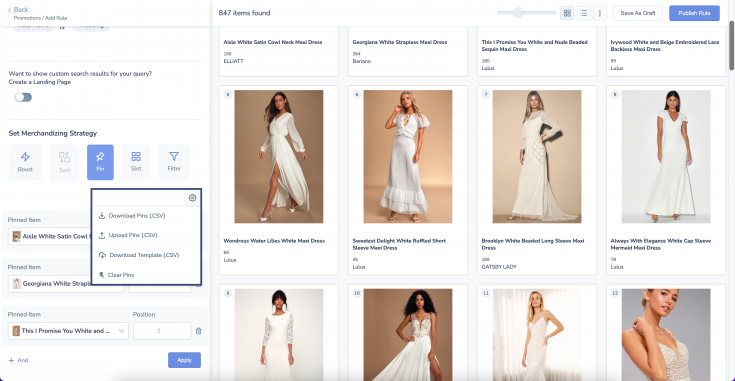
- After navigating to the Pin section, click the Settings icon.
- Click Upload Pins (.CSV)
- Once done, save the promotion as a draft by clicking Save As Draft or publish it live immediately by clicking Publish Rule.
Apart from uploading Pins, you can,
Download Pins: Allows you to download the pinned products’ info as a CSV file.
Download Template: Allows you to download the layout information as a CSV file.
Clear Pins: Allows you to clear multiple pins simultaneously.
How to implement Filter?
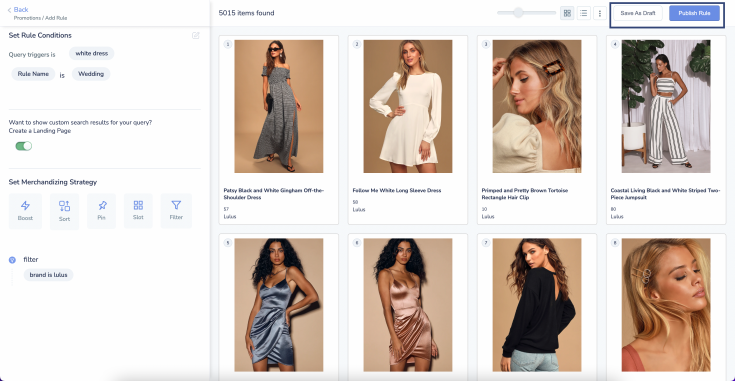
- Navigate to the Set Merchandising Strategy section and click Filter.
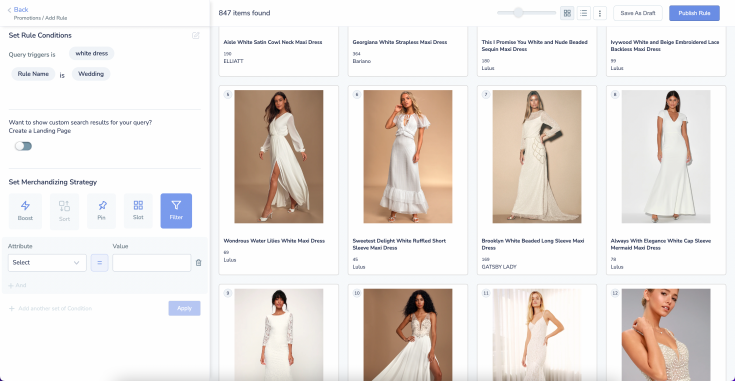
- Select the Attribute and the Value you would like to set the rule for.
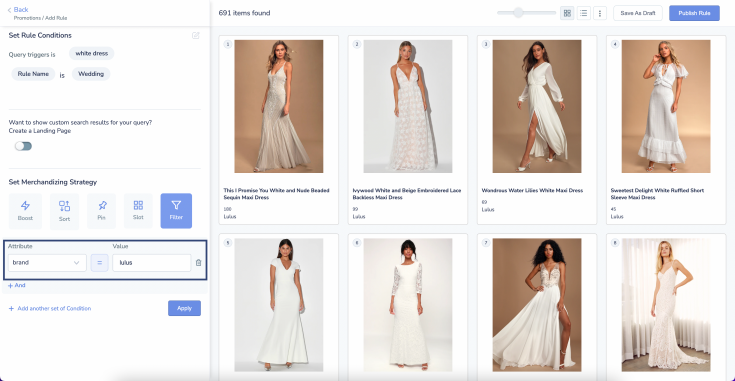
- Once done, you can
- Add more Filter conditions by clicking + And
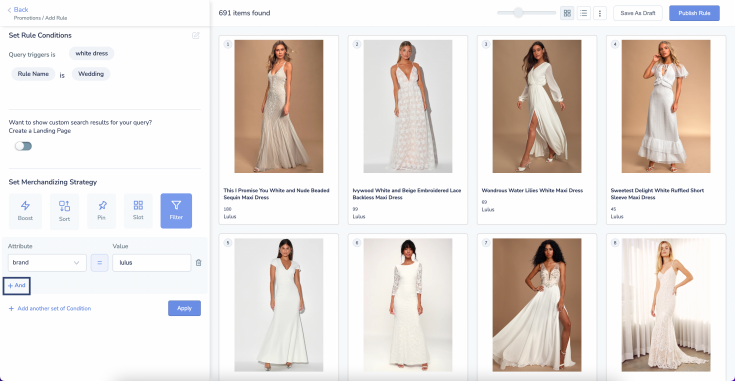
- + Add another set of conditions with a different option, or
- Click Apply
- Add more Filter conditions by clicking + And
- Save the promotion as a draft by clicking Save As Draft or publish it live immediately by clicking Publish Rule.

The Landing page option allows you to use a combination of Boost, Pin, Sort, Slot, and Filter rules to create a custom results page. As soon you toggle the Landing page option to ON, all the products in your catalog (irrespective of the search query results) become available to be displayed.
By using the Filter option, you can narrow down the set of products you want to include in the result set. Follow the same by adding any other rules or a combination of Boost, Sort, Pin, and Slot, to define the positioning of products in the result set.
This is helpful during special occasions or SALE seasons when merchandisers create a special page of products related to that particular occasion.
How to add a Landing Page?
- After entering the query and campaign name, toggle the Create a Landing Page option to ON.

- Navigate to the Set Merchandising Strategy section and use the option—Boost, Pin, Sort, Slot, or Filter, of your choice.

- Once done, save the promotion as a draft by clicking Save As Draft or publish it live immediately by clicking Publish Rule.
All Queries are applied to all the search queries received on your website.
Benefits of All Queries
- Promote products of a specific brand for all search queries
- Filter out-of-stock products in a single go and never display them on the search results page
- Promote or demote a product across all search result pages on your site.
How to configure All Queries?
- In the Promotions section’s listing page, hover over All Queries and click the Edit icon.
- Under All Queries, you will have two options—Boost and Filter, available under the Merchandising Strategy.
- Set the Strategy you prefer, and click Done.
- Save the promotion as a draft by clicking Save As Draft or publish it live immediately by clicking Publish Rule.